Clunking Noise When Pressing The Gas Pedal: 6 Causes & Fixes!
Do you know that 1.35 million people worldwide die in road accidents yearly? These mishaps are usually brought on by problems with your car’s engine, brakes, or other components.
However, these potentially life-threatening issues do not just appear suddenly in your vehicle. Your car does send some warning signals. One such instance is hearing loud clanking noises when you press the gas pedal. It hints at some growing issues in your car. So, don’t take it lightly and stick around to learn what the awkward noise might possibly signify.
Reasons For Clunking Noises When You Hit Gas Pedal
If pressing the gas pedal or changing gears causes the clunk it could be a warning sign that your car’s U-joint or CV joint is about to fail.
The other possibility could be your car’s low transmission fluid level. A weak motor or transmission mounts may be among the other reasons.
Now let’s discuss the reasons that can cause your car to generate clunkiness when you hit your car’s gas pedal.
1. A Low Transmission Fluid Level
Transmission fluid serves to lubricate and safeguard your car’s moving parts. When your transmission fluid is low, your car won’t produce as much hydraulic pressure, which might lead to gear slipping. Improper acceleration is a typical sign of gear slippage.
If you drive an automated vehicle, you got more reasons to be careful. The fluid in the car is in charge of transferring engine power to the transmission systems.
You might wonder how a low transmission level makes clunking sounds when you press the gas pedal. Your transmission level won’t function properly if it doesn’t have the necessary level. This most certainly produces clunky sounds when you press the gas pedal.
Fix:
Now, how much transmission fluid would your car require, then? For small passenger cars, it can be as little as 8 to 9 quarts. While for heavy-duty trucks, it can be more than 20 quarts. There is no need to check the transmission’s fuel level every other day.
In some cases, transmission fluid can outlast engine oil. As per Toyota Manufacturers, if you drive a manual car, you must change your transmission fluid every 48280.32 km (30,000 miles) to 96560.64 km (60.000 miles).
That range can often be increased from 96560.64 km (60,000 miles) to 160934.4 km (100,000 miles) if you have an automatic. However, there is no harm in changing your fluid early.
How to check transmission fluid level:
- Check it with the engine running and warmed up to operating temperature.
- The vehicle should be on a level surface.
- Unlock and pull out the locking dipstick.
- Clean it off, then reinsert it.
- Make sure it goes all the way down.
- Pull it out, and now you can take your readings.
- The transmission stick has cold and hot areas. If your transmission level is cold, you need transmission fluid till it reaches hot.
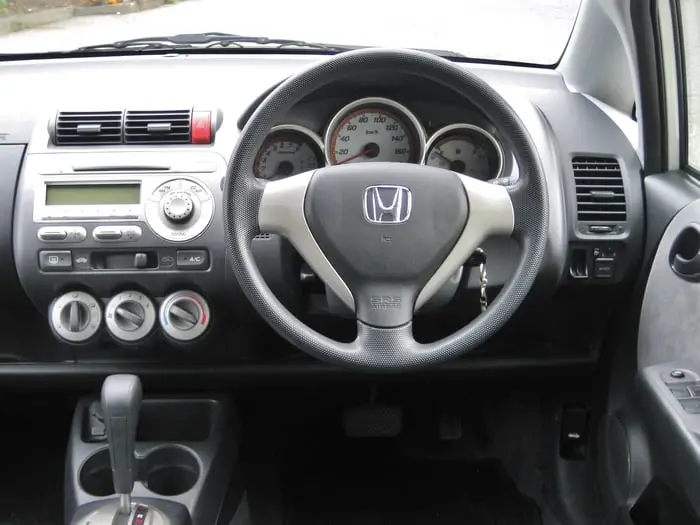
Now not every procedure for checking the automatic transmission fluid is the same. Honda, for example, has an entirely different system. Instead, with the engine running, when you check the fluid on Honda’s, the engine needs to be hot but off. But it needs to be on a surface level. Honda is not the only exception. The only way to be truly sure is to consult your owner’s manual.
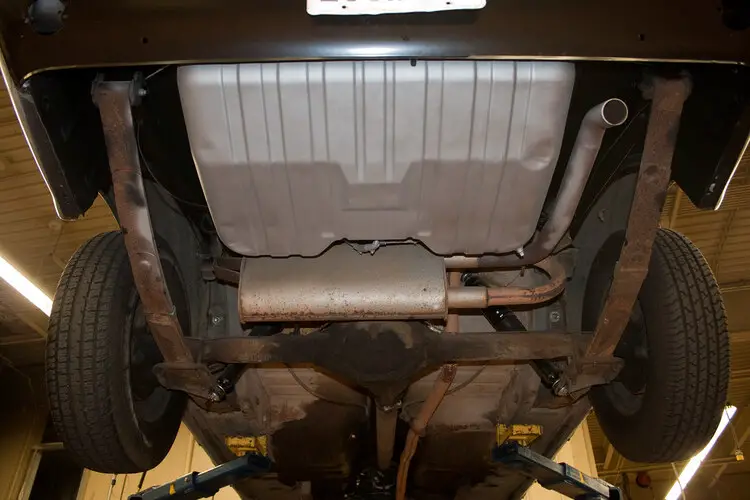
2. Loose Driveshaft
The flawless and smooth functioning of the car relies on numerous machinery parts and components. But it is the driveshaft that powers the vehicle. The wheels need to receive power from the engine delivered through the driveshaft to move the car forward.
When you have a damaged or failing driveshaft, driving becomes difficult. If you choose not to get your car repaired, you could seriously harm other drivetrain components of your vehicle.
Loud clunking noises are among the most common indications of a driveshaft problem. These noises are typically made by u-joints that are worn out. You might hear that awful clunking due to a loose driveshaft when you hit the gas pedal.
Check your driveshaft the next time you hear clunking sounds when you press the gas pedal. Fixing your driveshafts might get you rid of clunking noise.
Driveshaft failure has additional disadvantages. If your car has a bad u-joint, it will affect the driveshaft’s ability to rotate correctly. When you drive at low speeds, a lack of u-joint lubrication might make squeaky noises. If knocking noises are made, your car might have a bad CV joint.
Your car won’t be easy to control if the u-joint is broken. Any problem that impairs your steering performance needs to be fixed right away.
Fix:
Keep your driveshaft regularly lubricated to guarantee it is always in good functioning mode. And if the noise problem persists even after fixing the driveshaft, you need to check out other possible reasons for the issue.
Watch How to Fix a Drive Shaft (U-Joint Replacement) for a more precise understanding.
The driveshaft replacement can be a but expensive, between $500 to $1000.
- You need to Jack up the rear end.
- Put the jack stands under the Vehicle so it doesn’t fall on you.
- crawl under the Vehicle and grab the driveshaft with your hands and pull on it; if it waggles back and forth, the U-joint needs replacing.
- To remove the driveshaft, go to the back of the rear end, where the rear end is, and remove the four bolts.
- Just get a wrench and loosen them all; now, once you have removed them all, the last bolt of the driveshaft falls right off, but before you pull it out of the transmission, get a drain pan and put it under the transmission pan to catch any fluids that leak.
- Pull the driveshaft out of the transmission.
- Looking closely, you will see a little clip holding the U-joints in. Hit it off with a hammer, and remember, U-Joint has four ends, so there are four clips inside. Take them all off.
- Here comes the tricky part; you need one of the U-joints removing tools to get it off.
- You put the driveshaft on top of the tool and then pick the socket that fits over the end of them.
- Hit it with the hammer to force the clip off, then do the other like this and take all the yoke off. Take the cap off the shaft, and off it comes.
- You need to put the new shafts U-joint back in and bolt it up. So take the two opposite ends off and slide it in, then put one cap in, push it up, turn it over, and put the other cap and start hammering.
- Once you get one cap in, put the clip back on, hammer it in, and repeat the process with the rest.
- Get the yoke and then hammer the caps on that too. Don’t forget to lock the clips back on them.
- Place the driveshaft back in. Just push it back in the transmission.
- Please ensure the bolts are tight and nice using two wrenches, one your wedge against the frame and the other you push on to make it right.
3. Loose or worn out mount on car shocks
Shocks and struts improve control by stabilizing your vehicle’s movements when turning, braking, accelerating, or driving on uneven terrain. A metallic clunking sound sometimes denotes mounting hardware is worn out or loose. A worn mount can cause the shock or strut to move up and down. A loose mount can enable movement between the bolt and attached components.
It is always advised to install new mounts and mounting hardware when upgrading shocks or struts. Finding the problem’s origin requires a thorough inspection of the car. Inspect your car, starting with the parts that connect the shock or strut to the car.
Fix:
Remember that appearances can be deceiving. You might not notice any issues with your shocks by just looking at them. A mounting or bushing may seem snug but permits movement when driving. Check to see if the shock’s bushes are still in good condition. If the shocks cannot be repaired, you must purchase new ones.
The bushes replacement procedure can cost you about $250 to $580.
How To Install Bushes
- Raise the car with a lift or jack, and secure your vehicle by applying the handbrake and using a jack stand.
- Unscrew the wheel bolts and remove the wheel.
- Unscrew all components obstructing the removal of the space part with the bush inside.
- Carefully select the correct drivers. The diameter of the bush driver must be 0.5 mm smaller than that of the bush. At the same time, it should be wide enough to exert uniform pressure on the bash shell.
- Identify the type of the bushes rubber ow with a metal or plastic shell. Remember that you may need a threaded puller spindle or a press when working with bushes.
- Treat the bushes with a WD-40 spray and press them out.
- Use a wire brush on the mouthing seat. Use a grinder if necessary.
- Grease the mounting seat slightly to make installation of the new bush easier.
- Press the new bushes in. Ensure the brush is inserted at a 90-degree angle; otherwise, you can damage the bushes and all the components it is installed in.
- Reinstall the part. Put the wheel bolts.
- Lower the car and tighten the wheel bolts one after the other in a crisscross pattern with the required tightening torque.
4. A bad transmission Mount
It securely holds the transmission’s rear, or tail shaft, to a cross member. The cross member is supported and attached to the frame of the car which is called the chassis. Commonly, transmission mount has a polyurethane suspension bushing attached to a bracket.
A faulty transmission mount’s noticeable side effect is the bouncing that happens as the car speeds up. Once the engine runs, you’ll probably notice a lot of vibration and frequent knocking. You might also feel a jolting motion when you shut off the engine.
But here we are discussing your gas pedal’s clunking noise when you hit it. A transmission mount that is in bad condition or is broken can be responsible for the clunking noise your gas pedal makes when you press it.
Usually, the sound is most noticeable during hard acceleration, hitting the gas pedal, abrupt braking, or when putting the transmission into gear.
Fix:
You don’t usually fix the broken transmission mount; you typically replace them. –– But if you still want to replace it you can learn a lot by watching this video: Subaru Transmission Mount How To Replace. Or follow the below steps.
- Jack up the car. Loosen up the mount bolts and remove them. And completely detach the transmission mount.
- You can cut the jack into 2×4 to fit, race it up and loosen the plate hanging in the bracket.
- When it’s entirely loosened, you can remove the mount.
- You will notice that the T-type thing is no longer with the lower part.
- Drive the new transmission mount in there. Jack it high and tighten all the bolts.
The process of replacing your transmission mount usually costs around $250-$300.
5. Failing Engine Mounts
An engine or motor mount’s primary function is to mount an engine to a piece of machinery in your car. It reduces shocks and vibrations when that machinery is in use. Engine and anti-vibration mounts protect the engine and enhance operator comfort.
Another indication of subpar or failing engine mounts is that the car engine makes an annoying noise. If your car jitters, has damaged hoses, and has misalignment issues probably your car engine mount is failing. A damaged Engine is another symptom of deteriorating engine mounts.
With regular wear and tear, the motor mounts, particularly those with rubber seals, frequently deteriorate with time. It is crucial to have a competent technician examine and fix any motor mount problems as soon as you see them. Your gas pedal’s grumbling noise may signal that you must get the engine mount serviced or replaced immediately.
Check out this video for instructions: Finding and Fixing Broken Engine Mounts if you want to learn how to fix your failing engine mount.
Fix:
It’s always recommended to hire a mechanic to do the job. Considering how challenging it would be for a repair to access your engine, replacing a motor mount may run you anywhere from $250 to $600. If you are a careful driver, engine mounts can typically last at least 5-7 years. Nevertheless, it is advised to check them frequently.
Engine mount replacement can cost you between $ 200 to $ 600, depending on your type of Vehicle and model.
How To Replace Engine Mount
- Spray the bolts with penetrating fluid spray
- Loosen the bottom bolts first with a breaker bar or shorter extension.
- Remove the top nut on the mount with a long enough wrench.
- Jack Up the engine; remember not to jack up on the transmission fluid. It will break right through, and you will have a huge mess. Find an area for the jack that doesn’t have a seal.
- Stack up some small pieces of wood to hit right on the metal block.
- Once the woods are on the metal block, the jack lifts the engine slightly to remove pressure from the motor mount.
- Loosen the bolts.
- Jack the transmission up more and get separation between the top of the mount and bottom so that the mount can easily be removed.
- Remove the transmission mount from the brack by removing the bolts beneath the bracket.
- Place the new motor mount on the bracket, install it, and tighten the bolts. Lift the transmission.
6. Faulty Shift Solenoid
The shift solenoid’s job is to regulate the transmission fluid’s flow. The shift solenoid receives an electrical signal from the transmission control module (TCM) indicating when and how much fluid should be pumped into and out of the transmission.
This facilitates proper gear shifting by controlling the flow of the transmission fluid. Consequently, faulty solenoids can lead to transmission gear shift issues and clunking noises by failing to control the flow of the transmission fluid. So the clinking noise your vehicle makes when you push the gas pedal could be a sign of lousy shift Solenoid.
How To Replace Solenoids:
- Drain the transmission fluid.
- Remove the bolts holding the transmission pan in place.
- The transmission pan will separate from the dipstick.
- You can clearly see the filter and solenoids with the transmission pan removed.
- You will see torque converter lockup and solenoids.
- You must press the little clip-in on the side to remove the solenoids and pull the wire out.
- Install the new solenoids, repeat each solenoid process, and torque the bolt down to 84 INCH lbs.
- Make sure not to break the clips with the connectors
- After if get the solenoids in, you can go ahead and replace the filters and torque the bolt to 84 INCH lbs
- Place back the transmission pan, move the transmission filter, then solenoids.
The process will cost you between $150 and $400, depending on the car part costs which can vary significantly between different models.
Is Driving A Car that Produces Clunky Noise Safe?
You might think your automobile’s noises when you press the gas pedal are not a big deal. But as we have mentioned, it might signify a severe issue. It can be the reason for drive shaft or engine mount failure. It might be fatal to drive when your vehicle has these problems.
If you are a pro at fixing your vehicle and know how to do it, we recommend examining your car once in a while and fixing these issues. Or else seek out the help of a professional mechanic.
So, don’t disregard any unusual noises you hear while squeezing the gas pedal! Please make a note of it and then get in touch with a mechanic right away.