How To Soundproof an Existing Wall (FULL GUIDE)
Wall soundproofing is the most common DIY soundproofing project. And yet, it’s the one that leaves people with more question marks than any other.
That’s because there are two completely different ways to soundproof walls.
One requires adding soundproof material INSIDE the wall.
The other requires applying soundproof material (usually acoustic panels) on the outside of the wall.
Placing material inside the wall is obviously more complicated and requires more time and effort. But it’s also a more high quality option because it improves the wall density structurally by reducing the empty, hollow spaces inside.
On the other hand, adding material from the outside is easier because you don’t have to remove the drywall or do any reconstruction. You don’t even need any experience with soundproofing to do it. It’s also the preferred method by recording studios and podcasters because it improves the sound inside the room by reducing the echo.
Which of these two options is the best for you? It depends on multiple factors; the amount of noise you’re dealing with, how much money, time and energy you’re willing to invest etc.
If you’re currently in the process of constructing or reconstructing walls in your home, I recommend the first option. But for standard soundproofing requirements, I recommend the second option because it’s more convenient.
With that being said, let’s check out the proper way to do the first and the second option.
1. How to add Soundproof Insulation inside the wall
If you want to soundproof your existing interior walls, insulation is one of your best friends.
Blowing insulation into existing wall spaces can and will make the walls more sound proof and prevent noise from getting in and out of the room.
But how do you insert insulation into an existing wall? It’s actually a simple process done with a machine which has special hoses. The machine pumps a spongy material into the free space inside the wall.
Often times, to create a clearing, a drill is used which machines holes into the wall where the drywall is and then the hole is used as an entry point.
Usually, fiberglass insulation is used in tropical or more humid areas mainly due to the fact that it dries quickly.
Cellulose insulation is another type of insulation which is used. It is environmentally safe, nontoxic and is relatively easy to produce. It’s made of shredded, recycled newsprint that is treated with a fire retardant.
Most insulation jobs require and use a blanket insulation method; this is also known as faced or unfaced insulation between the studs of a wall. This blanket insulation is often made up of fiberglass and comes rolled up or in batts.
Rigid foam board is also a common type of insulation; made up of polystyrene, polyurethane and polysocyanurate, it provides excellent sound and temperature insulation to the walls. While it’s a more expensive solution than the previous ones mentioned, it is also better.
Important: Cover your fiberglass blankets and foam board insulation with a drywall or other types of finish walling; building and fire codes require it.
Starting with the insulation process
Before you start:
The first step in the process of insulating and sound retarding your walls is to solve any water leaks, or air leaks and dampness issues.
If you find it necessary to reduce the water vapor coming through the external walls, cover the walls from the ground level to the top level with plastic sheeting.
Adhere the sheets to the wall using a caulking gun. Take your time to make seals between the joints and the mudsill and put foam sealant on the top to stop air from infiltrating the walls.
This is because building codes require insulation to be covered; building wall frames between insulating with 2 x 2 boards every 16 inches along the basement walls and pressure treating them.
Starting
Attach the bottom plates to the floor using the liquid nails adhesive and drill holes with a masonry bit piece every 16”.
Driving concrete screws into the holes, attach a 2 x 2 board to the wall. Start from the top and drive screws every 2”. Check if the boards are balanced using a level and attach them to the wall with concrete screws.
In the walls perpendicular to the first floor joists, cut lengths of unfaced batt solution and press them between the joists and against the band joist. On parallel walls, press the insulation with the kraft side which faces the floor above. Hold it in place using insulation hangers that are pressed firmly between the joists.
2. How to soundproof walls without drywall removal
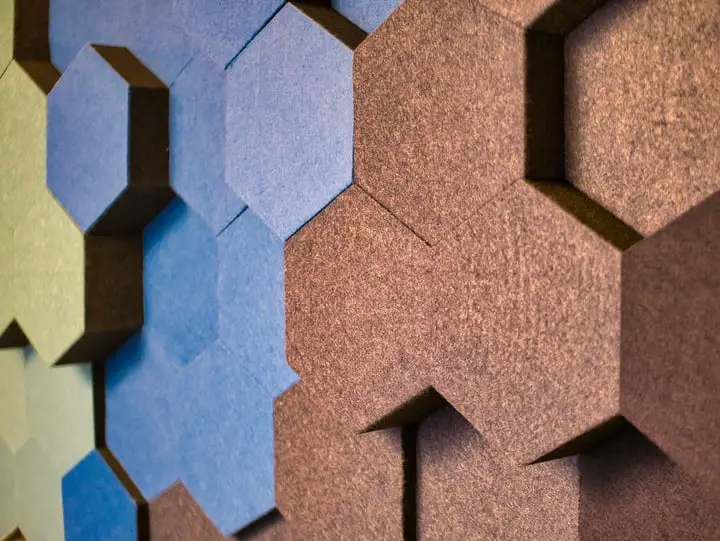
Soundproofing your walls without removing the drywall can be a bit complicated. However, there is one simple way to do it. Acoustic foam panels are often used is music studios or on walls that have a lot of returning echoe.
They ensure a noise-free environment and are simple enough to install that anyone can do it. Basically, getting a pack of this soundproofing foam is simple enough and most online stores such as Amazon have them.
They’re relatively easy to install, you don’t need to destroy any walls, remap any drywall structures or anything. When properly placed, they can make the room almost dead silent while being as easy to install as a wallpaper.
Measure the wall(s)
Measuring is the first and most important step when it comes to applying acoustic foams for wall soundproofing. It will ensure that you have optimal coverage without having any leftover foam. You ought to do this process before ordering the foam in order to avoid expense issues.
Cut the panels according to the required measurements
After measuring out the wall, you can cut the foam panels to shape accordingly. Use a handsaw for this process or a foam cutter. Starting with just one or two panels so you get the hang of how the cutting process is done; otherwise, you’ll just ruin the whole batch if you’re careless.
There are different packs for acoustic paneling. Getting a 12 pack acoustic studio foam may be a good choice since it will do you a solid job when it comes to soundproofing walls.
The panels come in different colors so you can add the colors that best fit your wall. Since each tile is 1 square feet, you have a lot of area a 12 pack can cover. If the area covered isn’t enough, you can opt in for the 24 pack.
These panels black sound extremely well and are a nice, overall package which you can’t get go wrong with.
Applying the acoustic foam
After cutting the panels to size and required shape, all you need to do then is apply it. This is a simple process, but if done incorrectly, the panels will be inefficient or just straight up fall off the wall.
Of course, you need something to stick the panels on the wall. Glue is not the ideal solution, mainly because of the fact that the foam will not stick properly to the wall with it.
Instead, opt for foam tacks that are created especially for foam products and sound retarding materials. Do not use too much foam tack, since it’ll just start making the acoustic foam soggy and the foam will cause the wall below to become damaged and the foam to eventually fall off completely.
I’ve reviewed a few excellent foam panels in this article, so make sure to check it out.
3. Mass Loaded Vinyl – a bonus option
Mass loaded vinyl is an amazing material that helps in fully soundproofing your wall. In order to fully soundproof, you need a heavy material that acts a barrier, dampening the walls from sound vibrations and reducing the sound volume in general.
Vinyl wrapping helps with blocking different sorts of noises. It works well for low and high frequencies, and is excellent at absorbing vibrational sound.
Vinyl can help reduce or completely eliminate vehicle noise, noise coming from neighboring apartments, from roofs and from walls.
Setting up the soundproofing vinyl
Measuring process:
Gauge the distance between your floor and the roof. Subtract 1/8″ – 1/4 ” from the measured length. Place the Mass Filled Vinyl fabric on the floor, then reduce to the required length.
Use a good knife to slice the MLV to size. It’s important to keep the dimensions proper for the best results.
How to apply soundproofing vinyl
With the help of another person, position the first amount of MLV in one corner of the wall. Make sure that the Mass Loaded Vinyl is straight across the ceiling to be able to evenly drape the wall. Maintain a straight gap along both floor and roof. Utilize a Pneumatic Cover Stapler for quicker assembly. Fasten to every 8″ along the very best plate and along the space of the studs.
For 16″ Center framing, hammer the toe nail and washer through the MLV every 24″ o.c. along the very best plate amount of each stud. For 24″ O.C. framing hammer yet another nail in to the top dish and bottom dish in between each stud.
Take care not to cover electro-mechanical outlets boxes. It is advisable to expose the outlet stores boxes as you set up each amount of MLV. Find the electric powered package in your wall membrane and softly press the MLV contrary to the box. Utilizing a Razor Blade and carefully slice the opening over the corners of the package. Keep this opening tight as it can be to the electrical package so you maintain a good seal.
Do it again steps 1- 6 until your complete wall or ceiling is protected in MLV. Where MLV seams show up over a stud, butt pieces against each other and tape with Vinyl fabric or Foil Tape. Where MLV seams comes between studs, overlap items by 2″. See Coping with Seams web page for detailed training.
Hang up your drywall within the MLV, vertically or horizontally. Caulk the perimeter seams with Acoustical Sealant. Proper sealing is necessary to accomplish quality sound isolation results.
Conclusion
These are the 3 commonly used DIY methods for soundproofing walls.
Either one (or combination of them) will do a great job if done properly.
I hope you found this article helpful and feel free to check out other soundproofing advice on the site.