Best Acoustic Panels & How To Install Them Without Damaging The Walls
If you’re tired of noise coming into your home from outside or from one room to another, then you should increase the density of your walls.
The same thing is true if you want to practice an instrument or be really loud in a room without bothering your neighbors or other people in your house.
That is the ultimate role of soundproof foam panels. They’re the most popular solution for deadening and blocking noise.
However, some soundproof foam panels are better than others. This can depend on many factors, including their density, design, and combination of materials used.
Here is a list of panels that I recommend.
12 pack 12” by 12” Wedge Design Panels
These classic soundproof foam panels can be found in many households, especially in garages that are used for band practice.
They are pretty effective due to the wedge design that traps the noise and alleviates echo. The less echo there is, the lesser is the intensity and duration of the sound.
Each of these panels is one square foot large and one inch thick. It would be better if these panels were thicker in my opinion, but they still block the sound pretty well.
These panels also look nice, and there are different colors to choose from. Due to the wedges, you can place them in different patterns to break the monotony.
The biggest advantage when compared to other foam panels is the price. This is the most affordable solution, and the quality is pretty good.
The downside is that they’re not as durable as the other panels on this list. They CAN last you for years if you’re careful, but they are a bit thin. So you need to be gentle when installing them.
Other than that, you should know that soundproof panels (including these) collect dust, so they need to be vacuumed every once in a while.
These panels also have fire-resistant properties, which is a nice addition to the overall package.
Egg crate Foam 48″ X 24″ Panels
Instead of the wedgy design, these panels use the egg crate design to achieve the same purpose – block the noise and destroy echo in the room, thus improving overall acoustics.
These egg crate panels are commonly used in recording studios. Some experts believe that the egg crate design is superior to the wedge design at absorbing sound. Perhaps, but it also depends on the thickness and the material that is being used.
These panels are 2,5 inches thick, a 1,5 inch upgrade on the previous panels, so they have serious noise reduction capabilities.
On top of that, they’re larger than most other soundproof foam panels, at 4 feet by 2 feet. The fact that they’re larger has two advantages – you need to buy less of them, and they’re easier to install.
A thing to remember about foam panels, and especially these larger ones is that they arrive compressed. They’re either rolled up or flattened in plastic. So you should give them a few days to fully expand before placing them on the walls.
Due to the size of these panels, you might need to cut them in order to make them fit on your wall. The smaller leftover pieces can be wrapped around valuable items when moving.
In some cases, you can also use them to create a soundproofing box around your microphone, so that you don’t have to soundproof the entire room.
This is obviously not a realistic solution for band practice, but it can be helpful for podcasts.
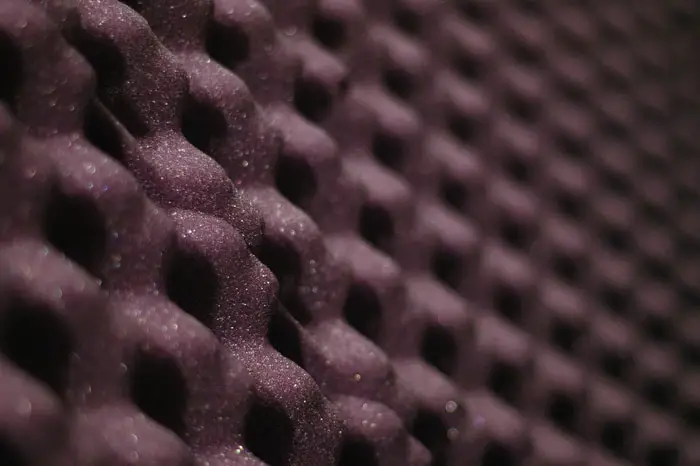
Fire-Retardant Wedges Foam Panels
Rarely anyone thinks about the dangers of fire when installing soundproofing foam panels. But foam panels can excarbate an already fiery situation.
Luckily these foam panels are not only fire-resistant but also fire-retardant. They have a Class A Fire Rating. So if safety is your number one priority, these are the ones you should get.
The other reason I like these foam panels is due to their aesthetic appeal. The maroon and gray combination looks really well, and you can place the panels in different ways so that the pattern of the wedges creates a more interesting design on the wall than the standard black or grey panels.
Here are some practical stats: these foam panels are 2 inches thick and have a density of 1.2 lbs per cubic foot. This makes them excellent at absorbing and reducing high and low pitch sounds.
What makes these panels stand out from the competition is the attention to details. They have clean, squared edges, so they look great when you line them up on the wall.
These USA-made soundproofing panels should last you for years and years without getting torn, jagged edges. That’s unless you have a habit of thinkering and adjusting the panels all the time, which I don’t recommend you do with any panels regardless of their quality.
One complaint I had about these panels, and I know another person had the same experience, is an unpleasant smell for the first 2-3 days after getting them out of the plastic bag.
It’s sort of an industrial smell. I’m not entirely sure whether it was due to the bag it came in or due to something else. Either way, the smell dissapeared after a few days.
Flat Sound Absorbing Panels
When buying soundproof foam panels, most people are equally concerned about blocking or reducing sound and making sure that the panels blend in well with the rest of the room.
As far as aesthetics are concerned, these flat panels are the best. First of all, because they’re flat, and secondly because they’re just a bit under 1 inch thick.
If you’re concerned about their ability to block sound because they don’t have a 3D design like the other panels on this list or because they’re not as thick, don’t be.
What makes these panels unique is that they’re made of fiberglass, which is an excellent material for blocking sound.
Another benefit these panels have is that they’re fire-retardant. They meet the UK Flame retardant standard, so they’re much safer than the generic foam panels.
There’s really no downside to these flat panels except for the price. If you need to cover a large area, you’ll have to buy a couple of sets, which can cost you a fair bit of money.
But if you’ve got extra money to invest in your home, and soundproofing the place while keeping it as aesthetically pleasing as possible is your top priority, then these panels are the obvious choice.
There are also four colors to choose from. Some colors are more affordable than others, so you might want to look into that as well.
MuteX Soundproof Material
MuteX is a solid alternative to foam panels.
The benefits of MuteX are that it’s only 1/4 thick and it’s lightweight, so it can blend perfectly in any room.
MuteX works really well at minimizing noises of vibrating surfaces, like you get with dishwashers, air conditioners, piping, ductwork, doors, walls etc.
It’s often used in garages, as well as industrial and commercial places.
It’s made of a combination of polymute resin and carbonweave, both very effective soundproofing materials.
I’ve noticed some reviewers complaining that in their case MuteX didn’t do much, if anything to lessen the noise. Others claim that it’s very effective and rate it highly.
As I read the reviews I found the reason why some users were not having success with this product. It’s because MuteX works best when applied behind the drywall.
The best time to place it there is when you’re building or renovating, otherwise it can be a hassle. Placing it on the outside of the wall is simply not as effective.
One reviewer wrote that he placed it in his car. Even though the formal description states that it can be used in cars, it’s certainly not the best way to use it. This material is designed for walls, not old cans thumbling down the street.
But there is one alternative way to use MuteX, and that is by applying it on DIY panels like this rockwool board. You apply MuteX on the board and then cover it with some fabric.
This would do a good job of eliminating most, if not all irritating sounds you’re dealing with.
How-to Use & Install Soundproofing Foam Panels
When installing soundproof foam panels, it’s important to make sure you don’t damage your walls in the process.
If you use an adhesive by applying it directly to the wall you’ll definitely create some damage.
The same is true with stapling or nailing the panels to the wall. Sure, it’s a fast way to get it done, but there is a much better way to do it.
The goal you should have in mind is to install the soundproof panels in an ideal way so that they block the sounds but also don’t damage the wall.
If you follow these installation steps you’ll accomplish exactly that.
1. Arrange the panels
Before you start placing the panels on the walls, you should have a clear plan on how you want to arrange them.
Decide where you want to place them and do some measuring if it’s necessary. Then arrange the panels in the order in which you want to place them.
Another thing you can do is mark the wall with some painters tape on the places where you’ll place the panels.
2. Mount the panels on cardboard using spray adhesive
If you’re just gonna place single panels on various spots, you can skip this step. But if you want to place many panels together, do this.
Spray the back of the panels with a spray adhesive like Loctite Spray Adhesive. Then mount the panels on the cardboard.
After it dries, cut off the excess cardboard.
Now you can place the soundproof panels on the wall as one unit.
3. Use 3M Command Strips to attach the grouped panels
This third step involves hanging the panels on the wall.
I recommend you use 3M Command Strips. It’s the most reliable way to do it without damaging the wall.
If you’re hanging the panels vertically on the wall, you need to use a strip on both top corners. If the panels are a bit heavy, you should also place one in the top centre, just in case.
The application is a very straightforward process. You’ll need to apply two strips. One to the back of the panel and one on the wall.
Just remove the strip that covers the adhesive. Then press the panels into the wall, so that they connect with the Command strips on the wall.
You can remove the panels and move them around until they hang on the wall exactly how you want.
In case you didn’t use the cardboard, the same rule applies. You can use these strips directly on the panels, and the effect will be the same.
How to place the Panels on the Ceiling
If you want to hang the panels on the ceiling, you should use more strips.
The pressure on the panels will not be the same because of gravity, so you should use strips on all four corners of the panels.
If you’re placing many panels at once with the cardboard trick, you’ll probably need to use a few more strips as well.
The good thing about soundproofing the ceiling is that most of these panels are quite tough. Even if they fall off on your first try, they won’t suffer any damage.
Simply add more strips until you hit the number when the panels stick properly.
What material is soundproofing foam made of?
Usually, soundproofing foam is made of acoustic foam. This is an open-celled type of foam that is usually based on polyurethane.
What makes acoustic foam different from other forms is its air resistance. It breaks down sound waves instead of letting them pass through the material.
Sometimes materials such as fiberglass are used. Fiberglass is an effective soundproofing material due to the friction that occurs between the fibers and the air particles. Because of this, the sound waves lose a lot of energy.
The third option is the combination of polymute resin and interlocking carbonweave. These materials are used in MuteX Soundproof. They work well at blocking noise and reducing sounds, especially those that are caused by vibrations.
Where can you buy soundproof foam panels?
Stores that sell this type of equipment can be hard to find. Larger tech stores or stores that sell musical instruments sometimes have basic foam panels, but that’s about it.
Soundproofing has only in the last couple of years become a DIY type of thing, so the easiest and fastest way to get the necessary gear is online. Plus, it’s more affordable, especially if you order through a well-established retailer like Amazon.
I saved you a lot of time already, as the panels I recommended at the top of this post have the best prices compared to their quality.
The 12-pack of 12″ by 12″ Wedges panels are a best buy option, but the others have their own qualities that might suit you better from a practical or aesthetic point of view.
Where should you place the panels?
If you’re wondering where to place your soundproof panels, it generally depends on what you want to achieve. You can place them on the doors, walls and the ceiling.
If you’re soundproofing a recording studio, you should place them in certain locations after determining the reflection points where sound bounces off.
If you pinpoint the exact reflection points, you can use less panels and save both time and money.
Here are some basic tips to follow:
- If you want to block outside noises, you can place the panels on the doors and walls of the room.
- To block the noise coming from above the room, you should place the panels on the ceiling.
With that being said, placing soundproof panels does require some experimentation. If you use the strips that I mentioned in this article, you can move the panels around until you get the results you’re after.
If you plan to keep the house/apartment permanently, you can just use an adhesive directly on the surface without worrying about placements or “damage”.
The “damage” refers to the state of the surface behind the panels, but if you plan on keeping them there indefinitely, it’s not really a concern.
That’s how I did it in my bedroom, and so far I’m happy with the results.
Are soundproof panels effective for drums?
Drumming causes a lot of noise both in the room where you play and basically throughout the entire house.
The reason why drums are so loud is because of the echo they produce. Acoustic panels can help in minimizing this noise to a large extent.
However, they’re not as effective when it comes to low-key frequencies like the kick of the bass drum.
Even though panels will minimize the noise within the room itself, they won’t solve the problem completely for the rest of the house.
In order to do that, you will need to take care of a few other things places from which sounds can escape.
1. Use a door seal
The door sweep area is the area between the bottom of the door and the floor. The front doors usually have a door sweep, while inside doors have a small gap.
A lot of the noise caused by playing drums escapes through the doors, so getting a door seal is quite effective.
It’s a very simple tool, and there’s not much difference between the multiple options available.
2. Block your HVAC system
HVAC system is a term used for “heating, ventilating and air conditioning” equipment.
Basically, if you have any kind of vent that connects the room you’re playing in with the rest of the house, the sound will spread through that vent. Instead of completely shutting off the vent, you can use a magnetic vent barrier.
Simply place this barrier when you’re playing and take it off when you’re done.
3. Use a rug
Another thing you can do is place a heavy rug underneath the drums. This will reduce the vibrations a lot.
You can make this even more effective by placing some MuteX Soundproof Material beneath the rug.
Drums are really loud, so don’t expect that you’ll completely isolate the noise with these DIY soundproofing methods.
You can minimize it to a very noticeable extent, but in order to completely seal the room you would need to spend thousands of dollars on professional installations.
If you install soundproof panels, I advise you to use a door seal, block the vents when you play, and use a combination of a thick rug and MuteX material underneath your drums.
This way you’ll keep the noise at bay as much as possible.
Is Fiberglass Insulation better than Soundproof Panels?
If we compare them in terms of soundproofing capability alone, fiberglass insulation is better than soundproof foam. It stands out as the better option when it comes to absorbing low-key frequency sounds in particular.
The issue I have with fiberglass is that installing it can be a hassle. It’s easy to install during construction or renovation, but not on a finished product.
Soundproof foam is quite the opposite. It’s easy to install on the walls, doors and ceilings, and it’s more affordable.
It works well for almost every home situation, so I’m willing to bet you don’t actually need fiberglass unless you’ve got some serious machinery in your house that is causing tons of vibrations.
The fact that soundproof foam can usually be installed in an hour or less even by an absolute beginner gives it another edge over fiberglass.
So unless you already have a decent amont of experience with construction and renovation under your belt, soundproof foam is the better option.
How effective is Acoustic Spray foam?
Acoustic spray foam is similar to fiberglass in two ways. First of all, it’s pretty effective at blocking all kinds of sounds. It’s usually used between floors to block the noise of other people walking in the room above.
But it has the same problem when it comes to implementation as fiberglass. It’s easiest to use during construction or renovation. Technically speaking, you could spray it anywhere and it might block the sound to an extent, but it would certainly look unpleasant.
So even though it’s a strong soundproofing tool, I do not recommend acoustic spray foam unless you’re renovating or in the building process.
How To Make Your Own Soundproofing Panels
It is entirely possible to make your own soundproofing panels. It takes more time and money than just purchasing and installing regular ones, but it also gives you more freedom to get creative with the design.
To make DIY soundproof panels you will need:
- a mineral wool board or a fiberglass board
- screws
- an adhesive
- fabric (the fabric cover that you can design however you like)
Another cool DIY project you can do is create a soundproofed microphone box.
A box like that can be really helpful in improving the sound of your recordings if you’re a musician, podcaster or have a similar job or hobby.
A soundproofed box can also save you a lot of time and money if you planned on soundproofing an entire room only because of your microphone. Mainly because you won’t have to buy and install a lot of soundproofing panels.
This video provides great tips on how to make a soundproofed box successfully.
Alternatively, you can get an affordable portable microphone booth on Amazon.
Conclusion
In my own home, I’ve added soundproofing panels to my bedroom and living room, and it’s been one of the best home improvements I’ve made.
It’s made the place a lot quieter, and that’s exactly what my family and I need since we live next to a very busy street with cars speeding from both directions.
I hope you’ll find this information helpful and use it to your advantage. If you have any questions about these panels or soundproofing in general, let me know in the comment section below! – Luka Baron