How Much Does It Cost to Soundproof a Room? (ANSWER)
Soundproofing a room typically includes installing soundproofing material on the walls, doors, windows and sometimes the ceiling and the floor as well. It can also include areas such as air vents and a fireplace.
Soundproofing costs depend on multiple factors; the size of the room, the type and amount of soundproofing material that is used. In this article I’ll explain the expenses of soundproofing a regular room by using different materials.
After reading, you’ll hopefully have a better idea of how to soundproof your room effectively and without spending too much money.
Wall soundproofing cost
Walls are typically the biggest area of the room, so soundproofing them can cost anywhere from a few hundred dollars to a few thousand dollars. The materials typically used to soundproof walls are:
MASS LOADED VINYL
This material is excellent for blocking airborne and impact noise, and the whole spectrum of sound wave frequencies. I generally recommend using it more than others because it’s often the only thing that’s needed. By eliminating both types of noise with one material, you can save a lot of money.
The price of Mass Loaded Vinyl is typically around $200 for 100 square feet of the material. This is relatively affordable when compared to other materials such as acoustic fiberglass panels.
MLV can be installed on the wall’s surface, but it’s best to place it inside the wall. First cut it to size using a sharp knife, and then nailing it or screwing it to the joists (studs). If you’re installing it directly on the wall’s surface, use a regular spray adhesive.
Here’s a small video explanation of the installation process. You can also check out the features and customer reviews of MLV on Amazon.
MINERAL WOOL BATTS
Also know as Rockwool batts, this material is inserted between the joists and it adds real thickness and density to the walls. It’s the most common soundproofing material used in construction.
It ranks second when price and effectiveness are taken into consideration, since it’s great for blocking airborne and impact noise, just like MLV. 60 sheets with the 48″ x 24″ in size and 2 inches in thickness will usually cost you $50-$60.
These sheets can be easily cut to size by using a knife. However, it is advised to use gloves, a mask and glasses when working with mineral wool batts because the small particles can irritate the skin.
These batts are quite popular and can be purchased through Amazon, Lowe’s, Home Depot and probably some smaller stores in your local area as well. It’s usually cheaper to purchase through bigger retailers.
ACOUSTIC PANELS
Acoustic panels are not as effective for soundproofing as the other two materials which are top of their class. But they can still be effective for blocking low-to-medium strength noise. There are two options to choose from: soundproofing foam panels and fiberglass panels.
Foam panels are great for reducing echo in the room, but they won’t do much for blocking noise. For lesser amounts of noise they can be helpful as many users will say, but for dealing with more serious noise you’ll need fiberglass panels. These are quite expensive as you can see for yourself.
The most positive thing about using acoustic panels, regardless of the material, is that they’re easy to install. All that is required are a spray adhesive or hanging strips. Simply spray the back side of the panel or stick a hanging strip and then place it on the wall. Done! But as I said, it’s easy but costly.
REGULAR DRYWALL
Constructing additional layer or two of drywall can be really helpful for blocking noise. Mass blocks noise, and drywall is additional mass on the wall. Taken from Home Advisor:
“The cost to install drywall is about $1.50 per square foot. After material and labor are added in, the cost per panel can range from around $40.00 to $60.00. A typical 12×12 room, for example, will use 12 panels. This would put the cost at $480.00-$720.00.”
SOUNDPROOF DRYWALL
It costs roughly double, at around $3 per square foot. But it’s obviously more effective at blocking sound. It’s possible to reduce the cost of this project by installing the drywall yourself.
However, it’s a much harder DIY project than installing regular soundproofing materials mentioned above. If you’re leaning towards this method, here’s a Family Handyman tutorial explaining in detail how to hang drywall.
How to soundproof the ceiling?
All of these options can be used on regular walls, and the ceiling is no different. However, soundproofing a ceiling can be more difficult due to gravity.
It’s usually necessary to climb a chair or a step ladder to do the work. You might need a friend to assist you, otherwise it can take longer to finish as you go up and down for the material and the tools.
You’ll also need a friend when installing MLV on any wall, due to it’s size and heaviness. One person will have to hold the material in place while the other person screws it in.
Window soundproofing cost
Windows let in a lot of noise, simply because they don’t have the mass that the wall has. There can also be gaps between the window and the window frame through which sound can pass easily. Luckily, there are some excellent window soundproofing solutions.
NOISE-BLOCKING DRAPES
These thick drapes provide substantial sound and thermal insulation. Not only will they reduce the noise and cold/heat escaping through the window, but they also look nice and they’re pretty affordable. They cost anywhere between $25-$50.
When buying noise-blocking drapes, always make sure that they’re long and wide enough to cover the window and a few inches around the window. You’ll also need a curtain rod installed above the window to hang them.
WINDOW PLUG
A window plug is another affordable window method that also costs under $50. But if you want to see some sunlight together with the noise reduction, this is not a good long-term option because it will cause complete blackout when used.
A plug should be made of acoustic foam, a wooden panel and a handle. It should be only slightly smaller than the window so that it can fit inside and also be removed by pulling the handle.
But if you make it too small, it won’t hold on its own. This is a real DIY project that requires some handyman skill. Here is a more detailed guide on how to make a window plug.
ACRYLIC WINDOW
Installing an additional window pane will double the noise reduction capabilities of a window. Acrylic sheets are commonly used to add density to windows and replace glass. Acrylic is a tough material that has far better thermal and noise insulation properties than regular glass.
Acrylic sheets can be purchased Home Depot, Lowe’s and other hardware stores. Here’s a good DIY installation tutorial.
SEAL THE GAPS
The gaps between the window and the window frame are really important for sound and thermal insulation. They’re basically small cracks through which noise and heat/cold can pass through without any obstruction.
It’s also the cheapest piece of soundproofing you can do. Simply cover the window frame with weatherstripping tape until there’s a seal when you close the window. Done!
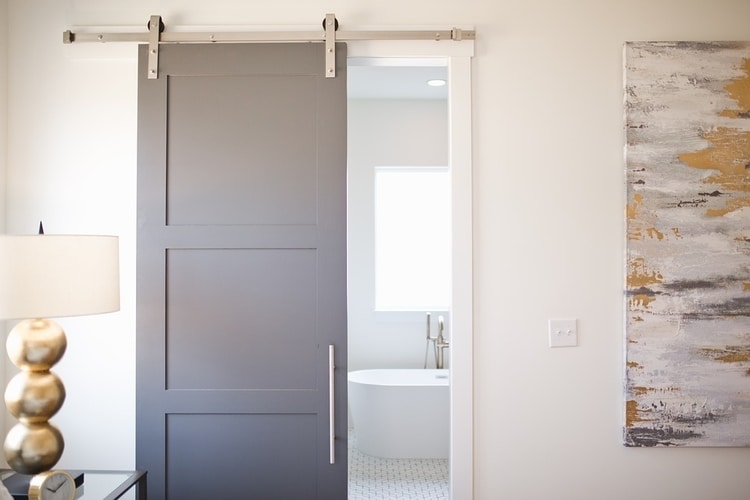
Door soundproofing cost
Door soundproofing is similar to wall soundproofing. It boils down to adding mass to make the noise barrier thicker. There are many ways this can be done. But these are the most popular because they’re easy to do and more affordable than others.
MOVING BLANKETS
These thick and durable blankets are used for moving furniture and sensitive items. But they are also pretty good for soundproofing and improving acoustics in the room.
I suggest tacking 2-3 layers instead of just one on the door in order to improve noise absorption. This is a really affordable option that requires very little work. You can use tacks, nails or screws to attach the blanket(s) to the door.
Make sure that you get really thick moving blankets, or you’ll have to use more layers to get the satisfactory thickness.
ACOUSTIC PANELS
Acoustic panels can be installed anywhere, including the door. All the things that I said about them before apply here as well. Foam panels mostly reduce echo and reduce noise only to a smaller degree.
If you want to get real noise reduction, fiberglass panels are the best option. Depending on the size of the door, it will cost you around $150 to soundproof it using fiberglass panels. Install them on the door with a spray adhesive or hanging strips that are used to hang frames, like Command Strips.
SEAL THE GAPS
Sealing gaps in the door is incredibly affordable and effective. You will find open spaces between the door and the door frame and also under the door. Believe it or not, these small gaps let in a lot of noise.
They can be easily sealed by taping the door frame all around with weatherstripping tape and by placing a silicon door sweep on the bottom of the door.
Other door sweeps can be a hassle, as you’ll have to cut them to size and screw them to the door. Too much work! Combined, sealing these gaps would cost you less than $20, and you’ll still have some tape left for windows and other doors in your home.
Even if you decide to install acoustic panels or blankets, if you don’t seal the gaps the noise will still be able to come through. So it’s really a necessity if you want great soundproofing results.
Chimney soundproofing cost
If you have a fireplace or a wooden stove, you may be experiencing wind noise coming from the chimney. Or perhaps you have some birds or raccoon babies in there. Who knows!
But whatever the case may be, you can block the noise by blocking the chimney or reducing its exposure to outside noises and weather. If you have this problem, you will find 7 simple and affordable solutions in my chimney soundproofing guide, ranging between $5 and $2000.
Air vent soundproofing cost
Air vent soundproofing costs very little money. There are three options available:
- using an air vent cover
- removing the air vent and dry walling the hole
- creating a sound maze inside the air vent
An air vent cover can be really helpful at blocking noise or bad smells from coming inside the room. However, air vent covers are typically made of thin plastic, which is typically not enough to completely block sounds from coming in and out.
If you really want to 100% soundproof an air vent, the only way to do it is by removing the air vent and patching the hole in the wall.
The third option is more elegant and requires a bit of work. But it will reduce noise quite a lot while also keeping the air vent functional. It’s called a sound maze or a labyrinth. Basically, you use wooden sticks to create a maze in the vent. When sound passes through it has to bump on all of these sticks before it can get out of the air vent. You can make it by yourself in 20 minutes or less.
All of these options are incredibly cheap, and shouldn’t cost you more than $20.
Floor soundproofing cost
Floors are trickier to soundproof than other areas. Perhaps you hear noises while walking. To fix that problem you’ll need to install floor floaters under the joists and tape the top of the joists with soundproofing tape.
For blocking sounds from coming inside or outside the room through the floor, the best option is to install a subfloor (floor underlay) out of plywood or MDF panels. Then cover the top of the subfloor with green glue. Once you’ve done that, you can cover both with the surface layer of the floor. Green glue has a jello like consistency and works really well for blocking impact noise.
Once the floor has been soundproofed from the inside, you can additionally cover it with a thick rug, carpeting or thick interlocking floor mats to get additional reduction in noise and echo.
The cost of soundproofing a floor really depends on its size and how many methods you use. Floor floaters and soundproofing tape are optional, if you don’t have a problem with screeching sounds while walking across the floor. But installing a subfloor is essential for additional sound (and thermal) insulation.
Here is a step-by-step floor soundproofing guide that you can follow to easily determine the cost of your project and properly soundproof the floor in any area of your home.
Final Thoughts
The costs of soundproofing projects can vary greatly. It depends on the size of the area, the number of methods being used, and also the type of materials.
The cost of materials can also be very different, in almost every case depending on their quality. Some materials like fiberglass panels for outside application are pretty expensive because they’re easy to install and provide good soundproofing. But other than that, quality is usually the only thing that determines the price.
So which methods and materials should you choose to soundproof your room? I’ve shared with you the most popular methods and materials, and how well they reduce sound.
Now it’s up to you to measure the room, and determine which of these options would block the noise you’re dealing with effectively. This will ultimately determine the cost of your project.