How to Soundproof an Apartment (FULL GUIDE)
READER’S QUESTION:
“Hi Luka! ..my daughter has a loud (and obnoxious) next door neighbour. Can you share some advice we can use to soundproof her apartment? And hopefully without hiring professionals. Thank you for all the information you’re sharing with the world! – Cynthia”
Well, thank YOU for the compliment and for the question Cynthia. I typically write articles on soundproofing just one thing at a time. But since you’re interested in soundproofing an entire apartment, I’ve decided to write a big compilation of tips for all the noisy areas you may encounter in the apartment.
Soundproofing an apartment can be costly, but if you use the correct material and install it by yourself, you can definitely save time and money. So here are some major tips for soundproofing an apartment.
How to Soundproof an Apartment:
1. Add mass to the walls
If the walls of your apartment are thin, they can’t do a very good job at blocking sounds coming in or out of the place. Additional mass is necessary to block additional noise. There are three popular ways that soundproofing professionals and amateurs soundproof apartment walls:
MASS LOADED VINYL – This is a powerful soundproofing material that was developed by NASA in 1960s. Mass Loaded Vinyl is flexible and heavy, making it possible to block impact noise (sound made by vibrations) much better than other products on the market.
It can be used to soundproof cars for road noise and engine noise, as well as walls and doors. Of course, it also provides protection against regular airborne noise. I always suggest screwing or nailing MLV on the joists (as shown in this video) before trying out any other wall soundproofing methods. Usually this is the only thing that’s needed.
MLV can be installed directly on the surface of the wall by using a spray adhesive, if you’re not interested in removing drywall to install it. However, the material is more effective at blocking impact noise when it’s attached to the joists.
The other reason it’s better to install it inside the wall is due to its looks. It’s black and probably won’t fit well in your apartment. If you’re determined to install it directly on the surface of the wall, it can be painted over with latex paint to match the style of the room. Also, placing large pieces of furniture in front of the wall can make it less noticeable.
ROCKWOOL BATTS – This is another option that involves some work. Mineral wool batts are placed between the joists (as shown in this video). They provide significant additional mass to the wall.
By making the wall heavier and thicker, they are great at blocking airborne and impact noise. This is a standard material that is most often used during construction to improve sound and thermal insulation of the walls.
The advantage of this product is that it’s reasonably priced and easily available at many large stores such as Amazon, Home Depot and Lowe’s. It can be installed by just one person because the batts are easy to handle. They can be cut to size with a bread knife.
However, I suggest using gloves, a mask and glasses because the batts can release small particles that can irritate the skin. This is one reason why this material is used primarily inside the walls.
If you decide to use the batts on the wall’s surface like soundproofing panels, that’s also an option. In that case, you’ll want to cover the batts with dense fabric that can contain the tiny particles. But just like with Mass Loaded Vinyl, the product is more effective when installed inside the wall.
FIBERGLASS PANELS – Fiberglass is an excellent material, very similar to mineral wool. The main difference is that it’s a bit more flexible.
Fiberglass batts can be installed inside the wall just like mineral wool batts. But what I want to focus on there is something different. Fiberglass panels are used only on the surface of the wall. They’re just like regular soundproofing foam panels, only better. And unfortunately more expensive. If you don’t want to reconstruct a wall and stuff MLV or batts inside it, this is the most effective alternative.
Fiberglass panels reduce airborne and impact noise to a significant degree AND improve the acoustics in the room by reducing the echo. Also, they look really good, because they’re flat and relatively thin in comparison to those wavy foam panels, and still quite heavy.
But unless you have a really big budget, this will probably not be a viable option for you. At least not for soundproofing all the walls. However, if you want some more visible parts of your home to look really nice when you soundproof them, like perhaps the living room area or a hallway, this is the way to go.
Fiberglass panels are also a great option for soundproofing doors. The best way to install these panels is by using hanging strips like Command Strips. Place 2 strips behind the panel and stick it on a wall. Done!
The other option is to spray the backside of the panels with a spray adhesive and then stick it on the wall. However, this can ruin the wall and make it harder to remove the panel later on. So the hanging strips is the better option.
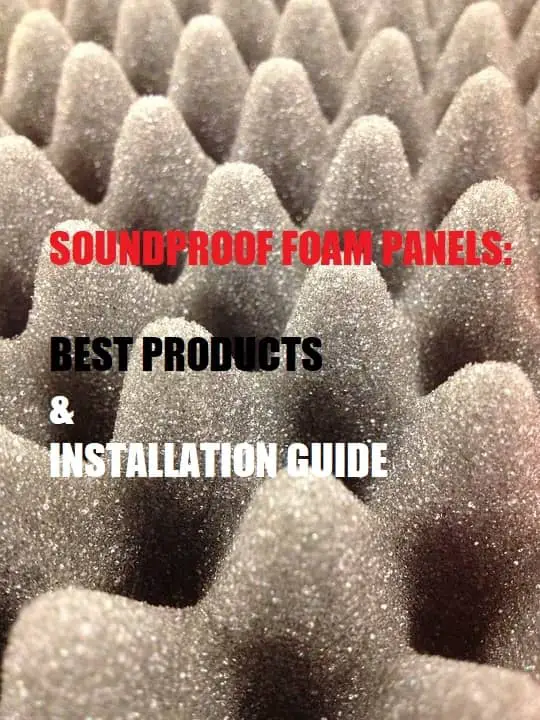
FOAM PANELS – Soundproofing foam panels will not soundproof the walls against any serious noise. They’re fairly light and the most you can expect of them is to muffle the noise and reduce the echo in the room.
That is their primary use – to reduce echo. For this reason they’re often found in recording studios, hanging on the walls. Therefore, don’t expect foam panels to solve your noisy neighbors problem or prevent others from hearing you in the bedroom or while you’re doing some strange voodoo ritual.
If you decide to use them to stop the sound waves from bouncing off the walls and producing echo, using hanging strips is again the best option. The second best option is to use a spray adhesive.
HEAVY BOOKSHELVES AND FURNITURE – If you’ve ever studied or worked in a library surrounded by bookshelves, you would notice that they can muffle some of the noise pretty well. Even without any walls!
Naturally, you won’t cover your entire apartment with books just to keep the noise levels down. But for a wall or two it can be a decent solution.
A large closet or a chest of drawers filled with clothes or other items can work in the same way. If you have such furniture in your apartment already, placing it strategically to muffle the worst sources of noise can help. Also, the more furniture and soft, plush material there is in a room, the less echo there will be, which can make the nosie more tolerable.
REGULAR DRYWALL – Hanging an additional layer of drywall (video tutorial) can also reduce noise because it adds mass and thickness to the wall. People are usually reluctant to do this because it involves construction work so it’s not as easy as installing MLV and other soundproofing materials.
And if you let professionals install it, it can rack up the price further. Drywall usually costs around $1,50 per square foot. The positive side is that it looks nice and provides additional thermal insulation as well.
SOUNDPROOF DRYWALL – Even better for reducing noise is soundproof drywall. It’s usually around $3 per square foot. However, some experts claim that when it comes to soundproofing, one layer of soundproof drywall is the equivalent of 8 layers of regular drywall!
While regular drywall consists of solid gypsum core, the soundproof drywall is a combination of solid gypsum, viscoelastics and ceramics. To learn more about it, click here.
2. Soundproof hollow interior doors
Soundproofing interior doors is important if you’re trying to reduce the noise between rooms in the apartment. If you’re only interested in soundproofing the apartment from outside noises, you can skip this step.
So, how do you know if a door is hollow or not? Just knock on it. If it sounds like it’s hollow, it is! And even if a door is not hollow, it can be thin and therefore pretty bad at blocking noise. Here are the best options for soundproofing a hollow and/or thin interior door:
INSERT MASS LOADED VINYL INSIDE THE DOOR – To do this, you’ll need to take the door off from its hinges. Next, carefully remove the wooden panel to open the door. Then use either green glue (powerful soundproofing adhesive) or regular spray adhesive to cover the inside of the door with Mass Loaded Vinyl. After that, return the wooden panel and get the door back on the hinges.
If the hinges seem a little weak, you may want to replace them with stronger ones so that they can tolerate the additional weight that you’ve added to the door. To see a more detailed installation guide, check out this article.
MOVING BLANKETS – One or more moving blankets tacked directly on the wall can also add mass and improve noise absorption. Moving blankets are pretty thick and heavy, and that’s exactly what is necessary.
For that reason, the thicker and heavier the blankets are the better. You can add as many layers to the door as you want. Just make sure that the hinges are strong enough to carry the additional weight or replace them with better ones.
ACOUSTIC PANELS – I’ve already shared the common wisdom about fiberglass panels and soundproofing foam panels above. Their effectiveness is same in this situation as well. Fiberglass panels are the superior option both for blocking noise and reducing echo. Foam panels will mostly reduce echo but don’t block noise as well.
While I recommend using hanging strips to install the panels on the walls, I recommend using a spray adhesive for on-door installations. Some users have reported that the hanging strips don’t hold as well on doors, because the doors constantly get opened and closed.
EXTRA WOODEN PANEL – Installing an extra wooden panel on the door can also get the job done. The standard materials are plywood and MDF. Make sure that the panel is of the exact size as the door. You can get a custom sized one at Home Depot.
You’ll also need to cut the inside for the handle. Spray the panel or the door with a spray adhesive (or green glue for improved noise reduction) and stick the panel on the door!
GET STRONGER DOORS – It goes without saying that you can also get new, thicker doors for your apartment. The weak should fear the strong! Doing this can make all the other door soundproofing tips that I just mentioned unnecessary, depending on how thick the new doors are.
However, it will definitely cost more than the other options, with the price for a thick interior door ranging between $200-$500. Considering the fact that moving blankets can be purchased for about $30, getting entirely new doors is quite expensive for simply reducing noise.
It also requires perfect measurements, otherwise the doors may not fit in the door frame. There are no universal measures for doors! This would mean returning the door and having it customized again. Overall, I would leave this as a last option.
SEAL ALL THE GAPS AND CRACKS – Any cracks in the door panel will lessen it’s effectiveness as a sound barrier. To fix door cracks, refer to this video guide.
While cracks are rare, gaps are present in almost every door, especially interior doors. I’m talking about the gaps between the door panel and the door frame, and the gap under the door. These might seem small, but ANY open space that allows air to freely pass through, is an open invitation for noise disturbance. Luckily, sealing these gaps is the easiest and cheapest thing you can do.
For the gap between the panel and the door frame, tape the frame with weatherstripping tape. When the door is closed, it should create a seal with the frame. For the gap on the bottom, you can attach a door sweep on the door.
The one that I recommend for most doors is the self-adhesive silicone door sweep. It’s really easy to install because it doesn’t require any tools for installation. Just like any door sweep though, you may need to cut it to size with a sharp knife if it’s too long for your door. Once you’ve done that, attach it to the bottom part of the door. Until your door sweep arrives, try placing a towel or a similar item under the door.
These two things are all that it takes to seal door gaps and it shouldn’t cost you more than $20. You can use the remaining weatherstrip on other doors and windows as well.
3. Soundproof the front door
The methods for soundproofing interior doors can also be used on exterior doors. But I would like to add two more tips that can be necessary for soundproofing some front doors:
MAIL SLOT COVER – Mail slots on front doors are typically installed on house front doors. Apartments usually don’t have them. Because it obviously wouldn’t be very convenient for the postman. But some apartments in smaller buildings do have them. This is another crack in the door that can let in sounds from the hallway and also reduce privacy.
If you want to reduce the impact this crack has on sound levels, get a mail catcher. This awesome bag cover the mail slot will block noise and stop any draft that would typically enter through the mail slot. It can also carry up to 10 lbs, which is quite a lot of mail!
DRAFT PROOF CAT FLAP – Just like a mail slot, a standard cat flap is made of thin rubber or plastic and lets in draft and noise. To ensure that this doesn’t happen, you can upgrade the current cat flap with something a little extra.
The Petsafe’s magnetic locking cat flap is a great way to thicken that part of the door while also preventing stray cats from entering your home.
This cat flap works through an electromagnetic system. The cat that has carries the magnetic collar key gets to come through the flap. The other cats don’t! It’s like having automated border control for cats.
4. Soundproof the apartment floor
Just like soundproofing walls, floor soundproofing follows the same logic: ADD MORE MASS! Here are some suggestions:
ADD MASS BETWEEN JOISTS – You can add mass to the form by placing mineral wool batts between the joists. It’s the same thing as if you were soundproofing a wall. These large mineral wool panels will provide additional sound insulation.
INSTALL A SUBFLOOR – A subfloor is basically an additional layer of wood placed under the floor’s surface. The materials that are recommended for most floors are plywood and MDF. Both will add a thick layer of wood to the floor and provide both thermal and sound insulation
GREEN GLUE – Green glue is both an excellent soundproofing agent and an adhesive. It has an almost jello like texture and it remains that way forever. Because of its texture it’s excellent against vibration noise, also known as impact noise. Green glue for floor soundproofing is typically administered on the subfloor, and then the surface layer of the floor is placed on top of it.
RUBBER FLOOR JOIST ISOLATORS – Before you do any of this other stuff, I recommend placing floaters between the joists. These floaters prevent the cracking noises you may experience when walking across the floor. The cracking noise is produced by the free space under the joists. With the joist isolators it’s easy to solve that problem.
THICK RUG/CARPETING/FLOOR MATS – Covering the floor with thick and soft material is great for reducing echo in the room and also preventing minor noises from the floor below. Doing this can provide a finishing touch to a soundproofed floor.
I’ve addressed all of these methods in my step-by-step floor soundproofing guide, so make sure to read it before getting down and dirty with floor soundproofing.
5. Soundproof the ceiling
To soundproof the ceiling, you can use any of the methods mentioned under “wall soundproofing”. All of them apply to ceilings as well.
The only additional difficulty is getting the material up there. You’ll need to use a ladder or a chair to install the material thanks to gravity. If you’re working with Mass Loaded Vinyl, you’ll want to call a friend or two to help you out with the project.
To learn how to install mineral wool batts on the ceiling check out this video tutorial.
The only other difference I can think of relates to hanging acoustic panels. You’ll want to use at least 3 hanging strips on each panel if you’re installing them on the ceiling. Due to gravity, using just one or two may not be enough. But there’s no harm in trying with just two and seeing if they hold or not.
7. Reduce air vent noise
Reducing air vent noise can be accomplished in two ways. If you want full soundproofing, you’ll need to take out the air vent and drywall the hole. If you want to keep the air vent functional, create a sound maze inside the vent by using a few pieces of plywood. It’s an easy (and fun) DIY project. A sound maze will brake down sound waves as they pass through the vent.
8. Soundproof the kitchen

Apart from soundproofing the floors, you should also think about reducing the noise of some loud kitchen appliances. A fridge, dishwasher and blender can all be pretty loud, especially if they have some loose components that need to be fixed or replaced. You can do all of that by following these step-by-step guides:
Noisy fridge: how to fix and soundproof
How to ACTUALLY soundproof a dishwasher
9. Reduce noise from the chimney
Draft can easily blow down through chimneys that don’t have a chimney cap or cowl installed. Even if they do, some drafts are too strong to contain by those outside installations. In that case, you can temporarily block the chimney from the inside with a chimney plug or a chimney balloon.
Some other things that can increase chimney noises are holes in the chimney, bent metal layers and even small animals that have inhabited the chimney.
When you light a fire, you may hear loud popping sounds as well. In that case, you’re dealing with an accumulation of dirt. There are simple DIY solutions for all of these problems. Check them out in this chimney soundproofing guide.
10. Fix a noisy ceiling fan
Ceiling fans will be louder if they haven’t been lubricated for some time. If they’re too loud, first lubricate the ball bearings with the proper lubricating oil.
If that doesn’t make it quieter, check the blades. Broken blades will produce more noise while they’re turning, possibly hitting against other parts of the fan.
Another common issue is dust and dirt accumulation. Clean the fan blades and also inspect the engine for any loose parts. Tighten them with a screwdriver if you find any. To learn more about these methods, click here.
11. Use a white noise machine to neutralize other sounds
White noise is a constant sound frequency that produces relaxation and peace of mind. It can also override chaotic sounds from the environment. A small sound dohm that produces white noise is an excellent tool for creating that soothing atmosphere at home and in a work environment.
Many people have a sound dohm in their baby’s room, as well as their bedrooms and offices. The Marcap Dohm Classic is the most popular white noise machine on the market with almost 7000 customer reviews on Amazon at the moment.
An alternative to a white noise machine is to simply play a white noise track on a computer or through stereo. Naturally, the sound won’t be as good and it’s hard to hit that perfect frequency that you get with the specialized machine, but it can still be helpful.
How to reduce soundproofing costs
1. Focus on the critical areas
If the bothersome noise is coming from only one side into your home, soundproof the walls, doors and windows on that side. There’s no reason to cover all the walls with soundproofing material if you can get away with doing less.
Also, you may not need to soundproof the walls at all if the noise levels are not too drastic. You maybe only need to take care of the windows and the doors by using relatively cheap items like moving blankets, thick curtains and sealing off the gaps with weatherstripping tape.
2. Order the right amount of material
Don’t purchase soundproofing material on a whim. You can money and time by measuring the walls and other areas you want to soundproof, and getting the right amount of material.
3. Expensive is not ALWAYS better
Some soundproofing products are more expensive because they look better or they’re easier to install. You can reduce the cost of soundproofing if you’re willing to get your hands dirty, especially when it comes to walls. For example, Mass Loaded Vinyl or mineral wool batts are more effective and affordable than acoustic panels.
Final thoughts
All of the methods and materials mentioned in this article have been implemented successfully many times already by soundproofing professionals and regular people, which is why they’re so popular. If you encounter any issues while soundproofing your apartment, feel free to shoot me an email and I’ll respond with my best answer. I hope this helps and good luck with your project!