How to Make Aftermarket Exhaust Quieter: Full Guide!
A quiet and comfortable driving experience is essential for most car enthusiasts. While aftermarket exhaust systems are designed to enhance a vehicle’s performance, they can sometimes be too loud for comfort.
In this comprehensive blog post, you will learn how to make your exhaust system quieter without compromising performance.
Understanding the Basics of Exhaust Systems
Before diving into the different ways to reduce exhaust noise, it is essential to understand the basics of exhaust systems.
An exhaust system comprises several components, including headers or manifold, catalytic converter, resonator, muffler, and tailpipe. These components work together to expel exhaust gases from the engine while minimizing noise and emissions.
Each component plays a role in sound reduction, and understanding their function is key to effectively quieting your aftermarket exhaust.
Components of an Exhaust System
- Headers/Manifold: The headers or manifold collect exhaust gases from the engine’s combustion chambers and direct them into the exhaust system.
- Catalytic Converter: This component reduces harmful emissions by converting pollutants in the exhaust gases into less harmful substances. Sometimes a faulty converter can cause a rattling noise. In that case check out the linked article on how to fix it.
- Resonator: The resonator works by canceling out specific sound frequencies, leading to a reduction in overall exhaust noise.
- Muffler: Mufflers are designed to reduce engine noise by absorbing sound waves and redirecting them through a series of chambers or baffles.
- Tailpipe: The tailpipe is the final section of the exhaust system, responsible for expelling the exhaust gases into the atmosphere.
How an Exhaust System Works
When the engine burns fuel, it produces exhaust gases containing harmful pollutants and noise. The exhaust system is responsible for channeling these gases away from the engine and passengers while reducing noise and emissions.
As the gases travel through the various components of the exhaust system, they are treated and muffled, resulting in a quieter and cleaner exhaust note.
Check for leaks and fix them
If there is a leak in your aftermarket exhaust system, it can lead to increased noise levels, reduced performance, and potential damage to other vehicle components.
To address this issue, it is essential to locate the source of the leak and repair it. Here’s a step-by-step guide on how to identify and fix an exhaust leak:
Identify the Source of the Leak
- Visual Inspection: Start by visually inspecting the exhaust system for any visible signs of damage, such as cracks, rust, or holes. Pay close attention to the areas around the welds, joints, and connections, as these are common locations for leaks.
- Auditory Inspection: Start your vehicle and carefully listen for any hissing or popping sounds that may indicate an exhaust leak. It may be helpful to have a friend rev the engine while you listen under the vehicle.
- Feel for Airflow: With the engine running, carefully run your hand along the length of the exhaust system, feeling for any air escaping. Be cautious not to touch any hot components and wear gloves to protect your hands.
Repair the Leak
For Small Holes or Cracks:
- Turn off your vehicle and allow the exhaust system to cool down completely.
- Clean the area around the leak using a wire brush and degreaser to remove any dirt, grease, or rust.
- Use exhaust repair tape, epoxy, or an exhaust patch kit to seal the leak.
- Once the repair material has cured, start your vehicle and check for any remaining leaks.
For Leaks at Joints or Connections:
- Turn off your vehicle and allow the exhaust system to cool down completely.
- Loosen the exhaust clamps or fasteners holding the affected components together.
- Inspect the gasket or sealing material between the components for damage. If necessary, replace the damaged gasket or apply exhaust sealant to create a better seal.
- Reassemble the components, ensuring a snug and secure fit, and tighten the exhaust clamps or fasteners.
- Start your vehicle and check for any remaining leaks.
In some cases, a leak may be too severe or the exhaust component may be too damaged for a simple repair. In these instances, it may be necessary to replace the damaged component entirely. If you’re unsure about the extent of the damage or the appropriate repair method, consult a professional mechanic for guidance.
Choosing Quieter Aftermarket Exhaust Components
In the quest to make your aftermarket exhaust quieter, selecting the right components can make a significant difference. It’s important to choose parts that not only improve performance but also help reduce noise. When shopping for a quieter aftermarket exhaust system, consider the following tips:
- Check the Noise Rating: Look for exhaust systems with a lower decibel (dB) rating, as this indicates a quieter system.
- Opt for Chambered or Turbo-Style Mufflers: These types of mufflers are generally quieter than straight-through mufflers, as they contain a series of chambers or baffles that help to absorb and redirect sound waves.
- Consider Systems with Additional Resonators: Exhaust systems that include additional resonators can further reduce noise by canceling out specific sound frequencies.
These considerations can help you make an informed decision and ultimately lead to a more enjoyable driving experience.
Installing a Resonator
The addition of a resonator can have a substantial impact on reducing exhaust noise.
Resonators are designed to cancel out certain sound frequencies and create a quieter exhaust note. To ensure optimal results, it’s crucial to select a resonator that is compatible with your exhaust system.
Selecting the Appropriate Resonator for Your Exhaust System
When choosing a resonator, consider the following factors:
- Material: Resonators are typically made from stainless steel or aluminized steel. Stainless steel is more durable and resistant to corrosion, while aluminized steel is more affordable.
- Size: The size of the resonator should match the diameter of your exhaust pipe. Additionally, consider the overall length and shape of the resonator to ensure it fits within your vehicle’s undercarriage.
- Sound Frequency: Different resonators are designed to target specific sound frequencies. Research and select a resonator that effectively cancels out the frequencies you find most annoying or problematic.
Step-by-Step Guide to Install a Resonator
Once you’ve chosen the appropriate resonator, follow this step-by-step guide to install it:
- Gather the necessary tools and materials, such as a wrench, hacksaw, measuring tape, and exhaust clamps.
- Measure and mark the installation location on your exhaust pipe, considering factors such as ground clearance and overall system length.
- Carefully remove the section of the exhaust pipe where the resonator will be installed using the hacksaw.
- Fit the resonator in the designated location, ensuring a snug and secure connection.
- Secure the resonator using exhaust clamps and test the installation to ensure proper fitment and noise reduction.
Upgrading Your Muffler
Another effective way to reduce exhaust noise is by upgrading your muffler. Mufflers come in various styles, each with its unique impact on noise levels. Chambered and turbo-style mufflers are typically quieter than straight-through mufflers. Research the different types and select a muffler that best suits your noise reduction needs.
Types of Mufflers and Their Impact on Noise Levels
- Chambered Mufflers: These mufflers use a series of chambers to create pressure differentials that reduce sound waves. They are generally quieter than straight-through mufflers and offer a deep, throaty exhaust note.
- Turbo-Style Mufflers: Turbo-style mufflers utilize a series of perforated tubes and baffles to direct exhaust gases through a labyrinth-like path, reducing noise levels. They often provide a quieter and more subdued exhaust note compared to other types of mufflers.
- Straight-Through Mufflers: Also known as glasspacks, these mufflers feature a straight-through design with a perforated tube surrounded by sound-absorbing material. While they offer minimal restriction to exhaust flow, they are generally not as effective at reducing noise levels as chambered or turbo-style mufflers.
How to Choose the Right Muffler for Your Exhaust System
When selecting a muffler, consider the following factors:
- Noise Reduction: Evaluate the noise reduction capabilities of the muffler by checking its decibel (dB) rating and the type of muffler (chambered, turbo-style, or straight-through).
- Material: Mufflers are commonly made of stainless steel or aluminized steel. Stainless steel offers better corrosion resistance and durability, while aluminized steel is more cost-effective.
- Size: Ensure that the muffler’s inlet and outlet diameters match your exhaust pipe’s diameter. Additionally, consider the overall dimensions of the muffler to ensure proper fitment within your vehicle’s undercarriage.
Step-by-Step Guide to Replace a Muffler
To replace your muffler, follow these steps:
- Gather the necessary tools and materials, such as a wrench, muffler, and exhaust clamps.
- Remove the old muffler by loosening the exhaust clamps and carefully detaching it from the exhaust system.
- Install the new muffler by aligning it with the exhaust pipe and securing it using exhaust clamps. Make sure the muffler is firmly in place.
- Start your vehicle and test the sound level to ensure the new muffler has effectively reduced the noise.
Sound-Deadening Wraps and Materials
In addition to upgrading components, using sound-deadening materials can further reduce exhaust noise. Some popular options include exhaust wraps, acoustic mats, and heat-resistant insulation.
These materials can be applied to specific parts of the exhaust system to absorb and dissipate sound waves, resulting in a quieter ride. Here are the top 6 automotive sound deadening materials to consider, along with reasons why.
*Benefits of Sound-Deadening Materials*
- Noise Reduction: Sound-deadening materials help absorb and dissipate sound waves, effectively reducing the overall noise level of your exhaust system.
- Heat Management: Some sound-deadening materials also provide heat insulation, reducing the amount of heat radiated from the exhaust system and potentially protecting other components from heat damage.
- Improved Comfort: Reducing exhaust noise can lead to a more comfortable driving experience for both the driver and passengers.
How to Apply Sound-Deadening Materials
To apply sound-deadening materials, follow these steps:
- Choose the right material for your exhaust system based on your specific needs and preferences.
- Prepare the exhaust components by cleaning the surface and removing any dirt, grease, or debris.
- Apply the sound-deadening material to the desired area of the exhaust system, ensuring proper coverage and adherence.
- Secure the material using appropriate fasteners or adhesives, depending on the type of material used.
- Test the installation by starting your vehicle and checking for a reduction in noise levels.
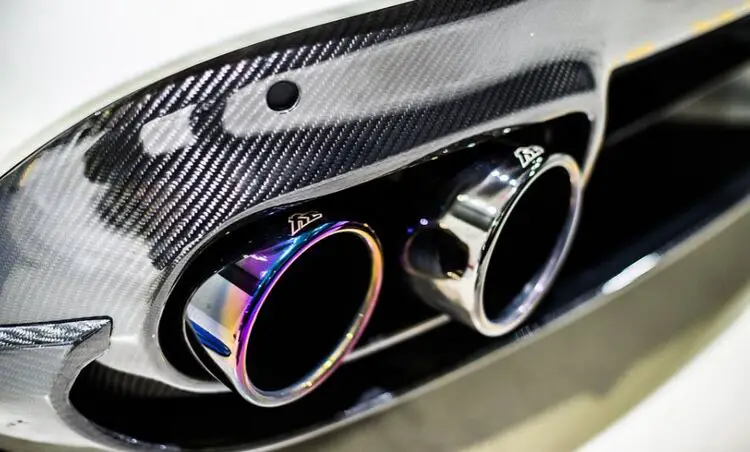
Adjusting Exhaust Tip Angle and Length
The exhaust tip can also influence the sound levels of your aftermarket exhaust. Different types of exhaust tips produce varying effects on noise. Adjusting the angle or length of your exhaust tip can help direct sound waves away from your vehicle, reducing the perceived noise level.
Effects of Different Exhaust Tip Shapes on Noise Levels
- Turn-Down Exhaust Tips: These tips are angled downward, directing sound waves towards the ground and away from the vehicle, potentially reducing perceived noise.
- Resonated Exhaust Tips: Resonated tips incorporate a small internal resonator that can help reduce specific sound frequencies, resulting in a quieter exhaust note.
- Double-Walled Exhaust Tips: These tips feature a double-wall design that helps to insulate and dissipate sound waves, potentially reducing noise levels.
How to Adjust or Replace Your Exhaust Tip
To adjust or replace your exhaust tip, follow these steps:
- Gather the necessary tools and materials, such as a wrench, new exhaust tip (if needed), and exhaust clamps.
- Remove the old exhaust tip by loosening the exhaust clamp and carefully detaching it from the tailpipe.
- Install the new exhaust tip or adjust the angle of the existing one, ensuring a secure connection with the tailpipe.
- Secure the exhaust tip using exhaust clamps and test the sound level to confirm the effectiveness of the adjustment.
Conclusion
By following the methods outlined in this comprehensive guide, you can significantly reduce the noise level of your aftermarket exhaust without sacrificing performance.
Keep in mind the importance of striking a balance between performance and noise levels, as well as adhering to local noise regulations.