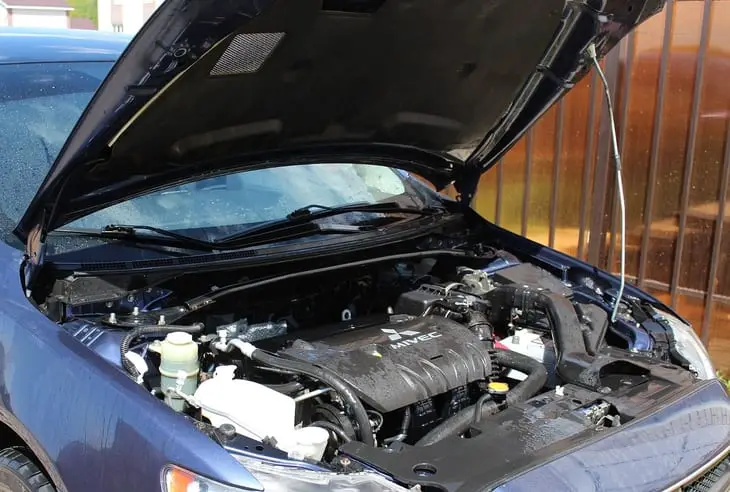
Honda Pilot Noise When Accelerating: Top 12 Causes & Fixes!
Hearing a noise while you drive could make you uncomfortable because it is often a sign of an inherent vehicle issue. These issues usually need to be fixed as quickly as possible to ensure you are safe and comfortable as you drive.
Some noises most cars make are perfectly normal, while others aren’t. This article will provide a step-by-step guide to removing the strange and unusual noises your Honda Pilot makes while accelerating.
Several factors may cause this noise, including the wheels, tires, transmission box, engine near the pulleys, and timing belt tensioner. These noises can be humming, hissing, whirring, exhaust bursts, backfiring, sputtering, kicking, knocking, and clicking. Some sounds are music to the ears, but certainly not all. Here is a step-by-step guide to potential causes and how to fix them.
1. Damaged wheel bearing (grinding/groveling noise)
When driving your Honda Pilot and the wheel gets challenging to turn, your car has a bad wheel bearing. A grinding sound comes off. Factors that cause premature wheel bearing failure are driving with imbalanced tires or having a bad wheel alignment.
If your Honda Pilot has damaged bearings, it is best to replace them rather than fix them. Below is a detailed guide on how to replace damaged wheel bearings.
How to replace a wheel bearing:
- Remove the wheel and loosen the castle nut while the parking brake is on.
- Release the parking brake and remove the caliper bracket.
- Remove the rotor.
- Use a slide hammer with a hub attachment to remove the hub.
- Remove the inside bolt. You’ll need a separate jack to support the spring perch to relieve pressure.
- Remove the 10mm bolts from the ABS sensor brackets. No need to remove the ABS sensor.
- Remove the flange bolt that connects lower arm B and the knuckle. This allows you to swing the knuckle down and out to remove the cv axle.
- Move the knuckle back and loosely insert the two bolts previously removed. This helps the knuckle stay level and sturdy.
- Remove the old bearing and replace it with the new one.
The video below will guide you in replacing your bearing:
Points to note before replacing your wheel bearing:
- To find out how to take off the CV axle, consult the handbook.
- Find a plate that touches the outer part of the bearing while pressing it in, but not the knuckle.
- The plate you use should touch the ridge inside the knuckle.
- Make sure you use a plate that ONLY touches the inner race on the new bearing
- Special tools needed: Bearing and Hub kit, slide hammer kit.
Note: Use plenty of grease on the threads and washers while using them to avoid stripping.
2. Backfires
A backfire occurs when fuel explodes outside the combustion chamber of your engine. Depending on the cause, it could happen in the intake or exhaust system. Moisture or water in the fuel system is the most typical reason. Backfires are not fun.
How to handle backfires
Change oxygen sensors. It is not a frequent thing to do, but it is necessary to stop your car from backfiring. Oxygen sensors help determine the oxygen level in the fuel compartment and send that intel to the engine control unit.
Also, keep your exhaust healthy. Often, the most visible backfiring happens in the exhaust system.
3. Defective hydraulic valve lifter (repetitive metallic ticking sound)
Your hydraulic valve lifter is malfunctioning if you hear a repetitive metallic ticking sound striking the inside of the engine. Poor low-end performance or an engine that misfires or runs rich are further warning signs.
If the cushion on a hydraulic lifter does not get enough oil from the pushrod or tappet, the lifter will not work. A worn-out or damaged oil pump or a clogged oil filter are additional causes of failure. Dirty oil can also block hydraulic lifter holes.
How to replace a hydraulic valve lifter:
A damaged hydraulic valve lifter requires immediate replacement to avoid spreading the damage to other lifters, which may have suffered wear.
To replace your hydraulic valve lifter, follow the step-by-step guide below:
- Take away any engine covers and any obstructions to the heads.
- Remove the valve covers from the head and clean them.
- To access the hydraulic lifters, remove the pushrods and roller-rocker arms.
- Take the lifters out of the camshaft and swap them out for freshly lubricated ones.
- Reinstall the valve covers after the pushrods and roller-rockers.
- Reinstall all of the engine tops and test-drive your vehicle.
Watch this video for a visual guide:
Regularly changing your car oil helps to prevent slime from building up in the lifter.
Change the engine oil regularly and always on the recommended mark.
4. Turbocharger’s whistling or rattling sounds
Several things may cause the turbo of your Honda Pilot to make a rattling or whistling noise. Observing the noise will help identify the likely cause and a possible solution.
Whistling sounds
If the whistling noise from your turbo happens from when you turn on the engine to while you drive, you may need to take it to a skilled professional to check immediately, as further delay may cause serious problems.
However, if your Honda Pilot’s turbo whistles only when you accelerate, there are usually two major causes. The heat exchanger or a supply hose might be perforated. In this situation, locating the particular cause will require a visual check. If the heat exchanger or hose is damaged, your mechanic can repair them.
Rattling sounds
If your Honda Pilot’s turbocharger makes a metallic rattling noise, it is usually due to a mechanical issue. This indicates that the turbo is not in good shape and needs immediate replacement to avoid further substantially higher problems.
How to fix turbo problems
Fixing turbo problems usually require the services of highly skilled professionals. You can follow the guide above to identify the likely cause of the rattling or whistling sounds before contacting a professional.
5. Ignition Spark Knocking
An ignition spark knocking sound usually happens when the car is under acceleration.
The common causes are poor ignition timing, lean air/fuel ratio, overheating, or improper fuel octane level.
Ignition spark problems are no fun, especially if they stop you from getting to your destination promptly. If you have an ignition spark problem, taking care of it will prevent you from being stranded.
How to deal with ignition spark knocking
Make sure you use the right car key and rotate the wheel back and forth till the ignition cylinder loosens. Ensure all the rest of the electrical system is unimpaired, such as fuses, relays, and circuits.
6. Humming sound from your wheels
If you hear a humming sound from the wheels of your Honda Pilot when speeding along the highway, two things might be causing it. Consequently, you must carefully examine your tires to identify the cause.
The two main reasons for this humming sound are irregular tire wear and huge tread blocks on tires. We have explained how to identify each of these causes and their possible solutions below.
Irregular tire wear
People frequently mistake tire cupping for a faulty wheel bearing because it is an irregular wear pattern that hums when speeding along the highway.
The prevalent causes of irregular tire wear are:
- Poor wheel alignment.
- Tires with excessive or inadequate air pressure.
- Damaged suspension or steering components
How to fix issues that cause irregular tire wear:
Poor wheel alignment: The key to proper adjustments is to adjust the angles of the tires and how they make contact with the road, following the vehicle manufacturer’s stipulations for parameters such as camber, toe, and caster.
Tires with excessive air pressure: A sign of excessive air pressure is when your tires are worn in the center yet have a good-looking tread on the sides. There should be a sticker inside the driver-side door of your Honda Pilot. You will find the recommended tire inflation pressures for your specific year and model listed on the sticker. Ensure that you inflate the tires to that level.
Tires with inadequate air pressure: When the edges of your tires are worn out, that is a sign that the air pressure is inadequate. Stick with the recommended tire inflation pressure on the sticker mentioned above.
Damaged suspension or steering components: strange tire wear patterns may result from worn-out suspension parts on your Pilot. This causes a condition known as cupping. If you look at your tires and notice diagonal wear marks, you should take your Honda Pilot for repairs because this is a major problem.
Note: Have a monthly check of the pressure in your tires, including the spare ones. You can visit your vehicle’s manual for tire pressure directions. Also, check your tires before going on a long trip or carrying an extra load.
7. Huge tread blocks on tires
It is a known fact that tires patterned with huge tread blocks make a lot of noise on the road. Check the pattern on your tires and determine if they might be the culprit.
How to handle it
Replace your tires with recommended tires for your Honda Pilot.
8. Humming sounds from your engine due to air leakage
If your Honda Pilot is making a humming noise but not losing power, one of your connections or air hoses probably has holes. To identify the source of this acceleration sound, evaluate the entire air supply system from your air filter to your engine.
How to evaluate the air supply system
- Identify All Vacuum Lines, Tubes, and Components
- Listen to the engine to identify any vacuum leaks or broken or loose air inlet hoses.
- Remove the PCV valve and make sure it is not jammed.
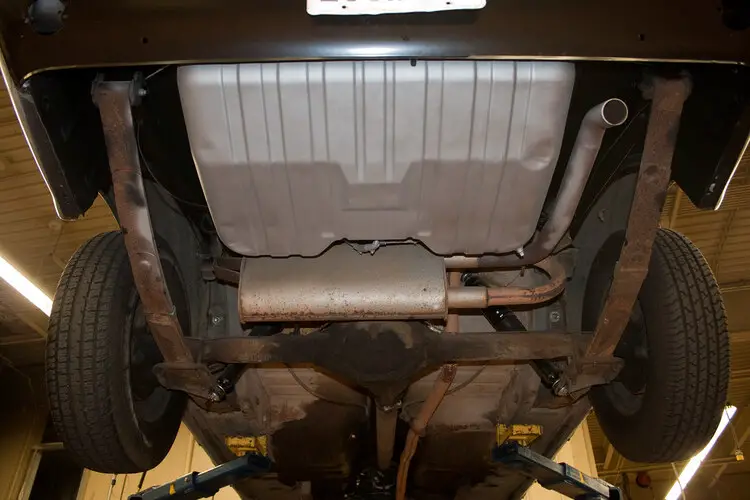
9. Broken exhaust pipe (loud rumbling sound)
If you hear a sudden loud rumbling sound while driving, then know that your exhaust pipe might be broken. If your car fails to perform effectively after the sound, you must check for a broken catalyst converter.
How to repair a broken exhaust pipe:
If your exhaust pipe is rusted or broken, it likely cannot be repaired and will need to be replaced. Nevertheless, if the issue is a small leak or an impaired muffler, you can fix the leak or replace the muffler using standard hand tools. Here is a guide on how to do this:
- Scrub around the hole to remove dirt.
- Wipe acetone on the pipe around the leak.
- Wrap exhaust tape around the leaking portion.
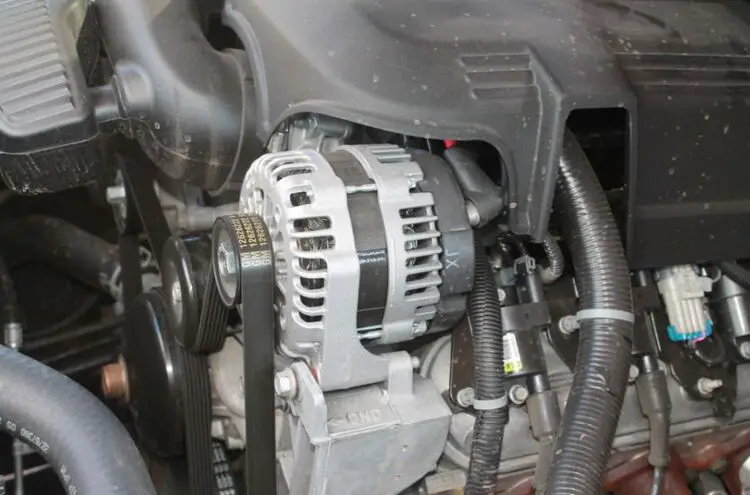
10. Worn-out alternator belt (screeching noise)
The pulleys in your engine are connected by alternator belts. These belts often link the alternator, water pump, power steering pump, and air conditioning condenser to the crank pulley.
They start to screech as they deteriorate, when the belt is not tight enough or when the pulleys are weak or out of alignment. The screeching noise may also be a clue that the belt is about to break.
It is recommended to routinely check your belt, particularly if it starts to make noise. This is important to avoid overheating, which may lead to engine failure.
Often, all it takes to stop the screeching is to examine the alternator belt to decide whether you should change it or tighten it. It is unquestionably time to replace the alternator belt if it is cracked or appears extremely dry.
If all you require is to tighten the alternator belt, you must be careful not to overtighten it. The lifespan will significantly reduce as a result, and it may even harm the bearings in components like the alternator or power steering pump.
If it is necessary to replace your alternator belt, follow the steps below.
How to replace an alternator belt:
- Place the car in a level parking position and engage the parking brakes.
- After the engine has had time to cool, open the hood.
- Draw a schematic showing the connections between the alternator belt and the various pulleys.
- To release the tensioner, use a wrench.
- Continue to exert pressure until the alternator belt is free.
- Take the belt off.
- Verify that the length of the new and old belts are the same.
- Lay the replacement belt underneath the AC compressor and the crankshaft pulley.
- Cover the idler pulley with the new belt.
- Connect the alternator with the new belt.
- Place the new belt in the area just below the tensioner pulley.
- Attach the new belt to the pump for the power steering.
- Reposition the tensioner in the same manner as you did when you first took the belt off. Over the tensioner pulley, slide the driving belt.
- Let go of the tension, then take out the wrench.
- Reinstall the reservoir for the power steering.
- Verify that the belt is properly seated on each pulley.
This video will guide you in replacing your alternator belt:
Special tools needed: Wrench or Metric Sockets, Tensioner bolt may be 13mm, 14mm, or 19mm, Breaker Bar
11. Gear Box and low humming sound from under your car
A low humming noise coming from under your Honda Pilot may indicate a gearbox issue. The gearbox consists of several parts, and every noise coming from it usually suggests a different problem.
Also, the way to fix one differs from how to fix another. This is part of the reason why gearbox repair can be such a complicated process. It is therefore necessary to identify each noise and determine the exact problem.
A gearbox noise, even when you are in neutral, indicates that its internal components are worn out and need replacement.
Squeaks or humming noises when you switch gears in your Honda Pilot indicate that your gearbox needs to be replaced.
Also, your Honda Pilot’s gearbox may whine if it is not properly lubricated.
How to deal with a gearbox noise:
Examine the gearbox oil of your Honda Pilot and change it if it is black.
Use the double clutch to extend the life of the gearbox until you can replace it; this will slow down the pinions’ already advanced deterioration.
If the gearbox is damaged, consider looking for a second-hand or new gearbox. Only a few professionals can replace broken components of a gearbox.
12. Leak in the cooling system (hissing sound from the engine)
Hissing sounds emanating from your Honda Pilot are often a result of an overheating engine. This often indicates leakage from your cooling system. Another reason could be a clogged radiator.
How to fix a leak in the cooling system:
If you notice this while driving, pull over immediately, open the engine and allow it to cool down. Get your car home and follow the steps below to fix the issue.
Detect the leak by placing cardboard below the engine for hours. If a broken reservoir tank caused the leak, a simple radiator sealant will do the trick. Follow the steps below to fix the leak.
- Disconnect the antifreeze from the overflow tank.
- Note the area that leaks so you can easily find it.
- Remove the radiator cap. Ensure your engine cools down before removing the radiator, or you could damage your machine and hurt yourself.
- Detach the reservoir tank from the engine bay using a pair of pliers.
- Empty the reservoir tank into a disposable container.
- Wash the reservoir tank and allow it to dry.
- Apply some recommended sealant to the reservoir tank that is leaking.
- Press the super glue into the crack to fill it. Allow the glue to set or cure according to the instructions on the package.
- Once the adhesive dries, replace the tank in your engine bay, refill your coolant and reset it with a radiator pressure tester.
Conclusion
The Honda Pilot is a highly efficient vehicle. There are many reasons why your Honda Pilot makes a lot of noise when in acceleration. However, when looking for the right reason, you should always start with the most fundamental causes which are: faulty wheel bearing, damaged tire, broken exhaust pipe, back firings, and a leak in the cooling system.