How to Reduce Echo in a Room with Hardwood Floors
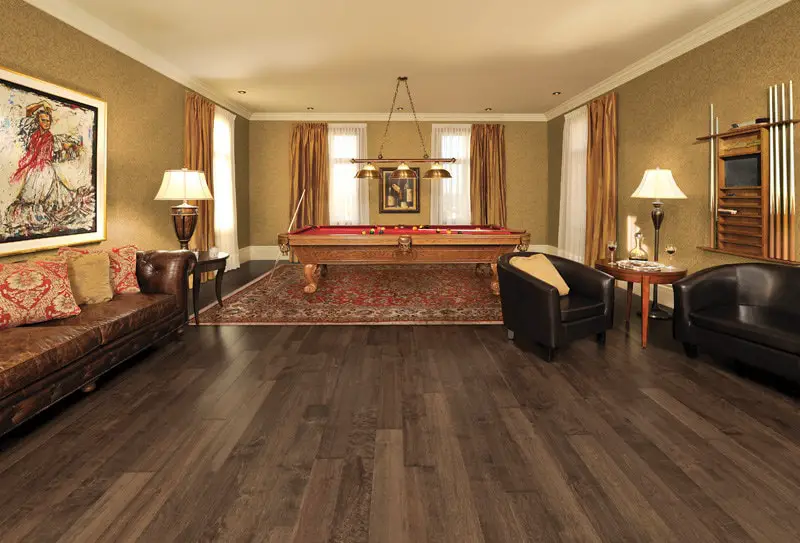
Hardwood floors can be an acoustic nightmare. Whether you’re recording a song, doing a podcast or simply having a conversation, a hardwood floor can make everything sound awkward.
That’s because a hardwood floor reflects the sound waves. The sound waves bounce from one hard surface to another, producing echo.
Echo reduction is one of the main problems discussed in the soundproofing community. So there are a couple of effective methods for reducing echo that many people have found to be helpful.
You can implement them by yourself, without having to pay a professional. And you might not have to spend a single dollar if you already have the material at home. So without further ado, these are the methods and products that I recommend:
1. Cover the floor with soft material
The only way to reduce echo is by covering the hard surfaces with soft material.
In case of a hard floor, you can use carpeting, a rug, cork tiles, rubber tiles and vinyl tiles. All of these simple options will get the job done.
Simply cover the floor with a soft surface that you prefer. The more of the area you cover, the better echo reduction you’ll get.
2. Cover the walls with wallpaper
When it comes to sound reverberation, hard walls are just as problematic as the floors. In order to make a wall softer and echo absorbent, wallpaper is a very simple solution.
Thicker, three-dimensional wallpaper will be better for absorbing noise and echo, because the noise gets trapped more effectively. This is why so many soundproofing materials are wedgy or have an egg crate design.
Make sure to cover the entire wall for the best results. Or if some parts of the wall are not covered, place some large furniture such as bookshelves in front. A sofa and a large painting could also work.
3. Hang acoustic panels on the walls and ceiling
Another approach you can take is to install acoustic panels on hard surfaces.
These panels are professionally designed to reduce echo in a room. That’s why you will find every recording and podcasting studio has at least a couple of those hanging on the walls.

The “more is better” approach is true in this case as well. So the more panels you’re able to install, the more echo reduction you’ll have. But even placing them sporadically across the surface of a wall will make a big difference.
These panels can also reduce the noise coming through the walls, so if you use thick panels, they will also act as soundproofing agents. They can be hanged on any surface by using hanging strips, spray adhesive or nails/screws.
If you’re interested in this method, these are the best panels and installation guide.
4. Place more furniture in the room
This is a very simple and possibly cost-free solution. If you can get a lot of soft furniture in the room, it can reduce echo further.
For example, bookshelves filled with books, perhaps some clothes hanging on a wall, and a sofa, pillows, fluffy toys etc.
All of these will soak up some of the echo. You’ll still probably have to use some echo reducing material directly on the surfaces, but not as much as you’d have to otherwise.
5. Hang noise-absorbing curtains on the windows
If there’s any windows in the room, make sure to cover them with soft material such as noise-blocking curtains or even thick moving blankets.
It’s true that even the thinnest curtains are better than nothing. But for real echo and noise reduction, I highly recommend using thick and heavy noise-reducing curtains. Because they’re professionally designed for this purpose and they can be hanged on a rod just like any other curtain, and they look really nice.
There are plenty to choose from, and prices can vary from as little as $15 to $300 in the case of designed curtains. The happy middle is around $30-$50 where you can find some really good options.
In this article you can see my top recommendations and a powerful method to DOUBLE their effectiveness.
6. Soften the door
A door is a thin and hard surface that also resonates noise. So you can hang acoustic panels on the door, or tack a moving blanket on it.
Alternatively, install a curtain rod in front of the door and hang a noise-blocking curtain or a moving blanket so that is hangs from it and covers the door.
If you decide to use a moving blanket, always choose the heaviest one available. The Supreme Mover blanket is the heaviest one I could find and it’s widely regarded as the best option for soundproofing projects.
Whether you should worry about the door at all depends on what type of result you’re looking to achieve. For a serious recording room, this step is necessary.
But for a room that serves a regular purpose, if you soften the walls and the floor, the door shouldn’t pose any problem because the acoustics in the room will already be pretty good.
7. Use a directional microphone and mic shield for recording
Directional mic mostly records sounds coming from only one direction. So if you place it correctly, it will focus on your voice, while lessening the other noises around you.
That includes echo as well. So when you’re speaking or singing in a directional mic, it doesn’t matter as much if there’s some echo going around.
You can improve it’s effectiveness further, by using a vocal recording panel. This way you can isolate the surrounding area around the microphone so that it only captures the sound coming from one direction.
These two options can be used both at the same time or just one. So you could use a regular mic and a mic shield, or a directional mic and a mic shield.
This is the simplest solution for those who are only interested in making decent recordings in a room with hardwood floors.
8. Build a recording booth
A more advanced solution for recordings is to create a small booth inside the room. The advantage of a recording booth is that it’s smaller, so it requires less material to reduce echo and outside noise.
You could basically use PVC pipes to create a skeleton of the booth, and then cover them with thick moving blankets. You could also place a rug on the floor and you’re pretty much done.
Now you have a small room inside the room that has no echo and also has less noise from the outside.
Here’s is a full guide on how to build a recording booth at home.
Final Word: Reducing echo in a Room
Hardwood floors are simple to clean and they look good. But as you’re aware the echo can be annoying especially if the room is not crowded with furniture. By covering large surfaces in the room with soft materials you can really improve the acoustics.
These steps have been used by thousands of people and they definitely work. They also don’t require any professional assistance or handyman talent. Because hanging curtains on a curtain rod and sticking acoustic panels/moving blankets/wallpaper on any regular surface is pretty straightforward.
Of course, before buying any material, make sure that you know the amount you’ll need. So have the dimensions of the room or the particular surface in mind when purchasing.
And one final tip: use a larger curtain, because it will cover more of the window area, thereby providing better soundproofing and echo reduction.
So I hope this helps! If you have any questions, feel free to leave them in the comment section below. – Luka Baron