How to Build a Soundproof Booth? 6 DIY Vocal Booths You Can Make
A vocal booth is a small and enclosed space with improved acoustics and reduced noise from the outside. Some singers and podcasters use a vocal booth in their homes and offices because it’s cheaper and easier than soundproofing an entire room to get clear and crisp sound.
There are different vocal booths you can build or buy. Some are better than others, and the price often reflects the quality. It really depends on how big your noise problem is.
In this article you can find the best DIY vocal booths and commercial alternatives that can solve the noise problem in no time. I’m sure you’ll find something that can satisfy your requirements.
How to make a soundproof booth
1. Vocal Booth with Moving Blankets – MOST AFFORDABLE DIY OPTION
In order to make this vocal booth, you’ll need thick moving blankets. You’ll also need curtain rod(s), or pvc pipes.
One location you can use for this vocal booth is a corner of a room. So it would be a triangular shape booth.
Option 1: Make a triangular booth
You’d install a curtain rod or a PVC pipe to create a triangular space and then cover the rod/pipe with a moving blanket or a couple of moving blankets, depending on the size.
This is very easy to do. Once the PVC pipe or curtain rod is in place, hang the moving blanket on it or use glue/screws/nails to keep it in place. You’ll also screw or nail the moving blankets on the corner walls.
The moving blanket should hang all the way down to the floor. The more area you’re able to cover the better.
An alternative to moving blankets that you can use are noise-blocking curtains. In this case you would definitely be using a long curtain rod or a combination of two instead of a PVC pipe. You should get longer noise-blocking curtains to cover more of the area.
One problem with the triangular booth is that it can be difficult to place anything on top. So if you want to cover the top of the booth you’ll need to use a square frame.
Option 2: Make a square booth
So if you find the triangular shape to be inconvenient, you can make a pvc pipe square frame instead. Then hang the moving blankets over the frame.
Here is an excellent video tutorial for doing just that:
All the items used to build this vocal booth:
Find these items at Home Depot or similar stores:
- PVC Pipes (10ft long, 3/4 inch)
- Side connectors (x8)
- Adapters for the side connectors (x8)
- PVC Tee (x10)
Items available through Amazon:
- PVC Cutter
- 4 Ultra Thick Pro Moving Blankets 72″ x 80″
- Led Strip Lights
- LED strip Power Adapter
- Nails
- Zip ties
What results can you expect?
This booth is not exactly soundproof as you probably suspect. But thick moving blankets act as a decent sound barrier and are excellent for preventing echo and sound reverberation. So this is a cheap and convenient way to muffle the noise.
But if you’re dealing with noise of more substantial volume, you’ll probably need a thicker barrier so here are some other ideas to consider:
2. Recording Booth in a Small Room – Simplest Solution
Do you by any chance have a small room in your home that doesn’t serve any valuable purpose? If you answered yes, then you can probably transform that room into a soundproof vocal booth.
Step 1: Cover the walls with MLV or Moving Blankets
This can easily be done by covering the walls, ceiling and floor with commercial soundproofing and sound deadening materials.
If you’re dealing with a lot of noise, covering the walls with Mass Loaded Vinyl would be a great idea.
MLV is used to block impact and airborne noise. It’s a dense and flexible material. It can be installed inside a wall on the studs (video tutorial) or directly on a wall surface by using screws/nails or a spray adhesive.
Cover all the walls (including the ceiling) with MLV to get the best results.
When you’re done, you may want to install closed-cell foam mat or acoustic foam panels on top of the MLV to reduce echo and improve the acoustics in the vocal booth.
In order to install closed-cell foam, you can just stick this self-adhesive mat on top of any dry and clean surface and it will stay in place.
If you decide to use acoustic foam panels, I suggest using a spray adhesive or hanging strips. Hanging strips are cleaner and make it easier to remove the acoustic panels later if you want.
But if the noise you’re dealing with is not severe, cover the walls with one or two layers of thick moving blankets instead by screwing or nailing them to the wall. This is obviously a less effective method, but it’s more affordable and it will provide both echo reduction and muffle the noise to an extent.
Step 2: Soundproof the floor
Should you soundproof the floor? That depends on whether any noise is coming from the floor into the vocal booth. Or if you don’t want your vocals to escape through the floor and annoy people downstairs. In that case, you’ll want to add mass to the floor by installing floor underlay.
Floor underlay is an additional wooden panel installed beneath the floor’s surface. Next, an adhesive is used and the floor underlay is covered with a standard floor surface.
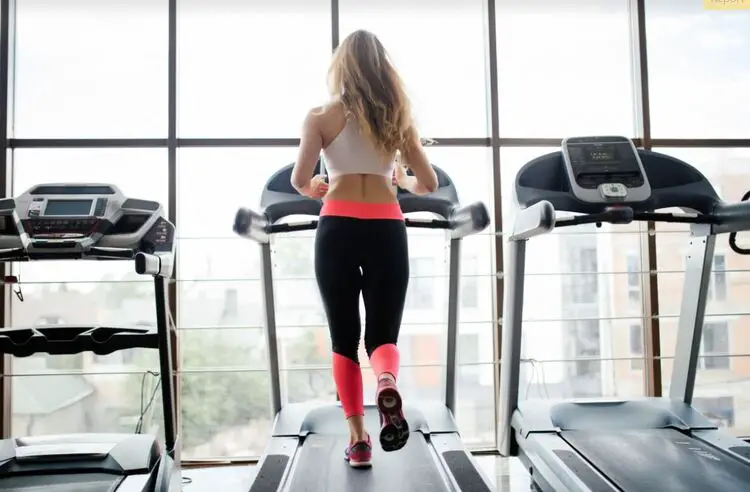
So whether you should do this step or not depends on your individual situation. But one thing you should definitely do in either case is cover the floor with soft material to improve the acoustics in the vocal booth. This can be a thick carpet, closed-cell foam mat or an interlocking rubber mat like the ones that are often used in commercial gyms.
It doesn’t matter which material you choose, as long as the hard floor is covered with a soft but thick surface that can absorb sound instead of amplifying it and allowing it to bounce around.
Whichever method you’re interested in, check out this floor soundproofing guide.
Step 3: Don’t forget the door!
The door of the vocal booth also needs to be insulated further. Either cover it with Mass Loaded Vinyl or tack a moving blanket on it. Also seal the gaps between the door and the frame by covering the frame with a door seal foam.
When you close the door there should be a perfect seal. And if there’s also a gap between the door and the floor present (usually is in interior doors), attach a door sweep to the door’s bottom. These are my top door sweep recommendations.
3. Build a wooden soundproof booth
A vocal booth can be built inside a regular room with thick wooden panels. It’s simple and effective to build, but it definitely requires more work than all the other options.
Step 1: Determine the dimensions of your vocal booth
How big should the vocal booth be? It depends on your personal preference and the amount of space you have available.
But let’s say that it’s at least 4 x 4 x 8 feet large. Once you know the dimensions, you can get enough wooden panels (and custom sized) from Home Depot or similar store to create the panel.
The dimensions of your vocal booth will also determine how much Mass Loaded Vinyl you’ll need because you’ll use it to further soundproof the wooden panels.
Step 2: Order the right wooden panels
The best wooden panels to use for soundproofing are MDF or plywood panels. They’re often use as subfloor material and for building soundproof boxes for generators and similar noisy equipment.
It is also the best choice for building a vocal booth. So pick one of these two types of wooden panels. Then purchase enough of them for all four walls, the ceiling and also for the floor. This wooden box will be the primary structure of your vocal booth.
Step 3: Make a door gap
There has to be an entrance point in order to enter the vocal booth in the first place. So either have a wooden panel custom made with a hole that will act as a door. You can later install the door or cover it with a moving blanket.
Step 4: Screw the panels together
Using a screw gun, screw the panels together to build the vocal booth. Also, wood screws are a beast so you may use those as well. Use as many screws as you need in order to make the box stable and safe. Use a few finishing nails for trim.
Step 5: Use tape to seal any gaps
Any gaps along the panels where they meet should be sealed by using tape. Weatherstripping tape or another variety can be used to do this.
Step 6: Cover the walls with Mass Loaded Vinyl
Now that the wooden box is finished, you’ll want to reinforce the wooden panels with a thick and powerful soundproofing material.
There’s no better option than MLV for this project. It’s durable, moderately priced, easy to cut to size and will deal away with impact and airborne noise equally well.
Screw/nail/glue the MLV unto the wooden panels from the inside of the booth. Cover all the walls of your vocal booth, including the ceiling.
Only the floor is optional, depending on whether you need to soundproof it or not. If yes, cover the floor with MLV as well.
Step 7: Finish the walls, ceiling and floor with soundproofing foam or moving blankets
Once you’ve covered the entire booth with MLV, you can place closed cell foam mats, acoustic foam panels or moving blankets on top of the MLV for extra echo reduction. This way you’ll get an extremely clear and crisp sound.
Some people might say that this is an overkill and that MLV is enough to reduce echo by a substantial degree. But in my experience having that additional defensive layer of soft material can do wonders for the acoustics.
It’s ultimately your choice. If your budget doesn’t allow for it after spending on wooden panels and MLV, try going without. If you’re not entirely satisfied with the acoustics, than add soundproofing foam or moving blankets later.
Step 8: Install a door
Now it’s time to cover the door frame. You can use a wooden door (hopefully a solid-core door, not a hollow door). Then you can cover it also with MLV and seal the gaps in the frame and under the door with weatherstripping tape and door sweep if needed.
If you can’t or don’t want to install a door, you can cover the gap with a thick moving blanket. But this will not be as effective so I recommend installing a real door.
You can get a custom-size door at Home Depot and similar stores.
Commercial Options:
What if you don’t feel like BUILDING a vocal booth? Well, there are some more or less effective alternatives that require zero effort on your part.
1. VocalBoothToGo – Mobile Vocal Booth
This is a very simple vocal booth, and also pretty costly. It’s made from a steel frame, sound blankets and bass traps.
It’s dimensions are only 3 x 3 feet so it’s fairly small. This can be a good or a bad thing. It’s easy to assemble and reassemble. Therefore moving it around is really easy.
Since it doesn’t cover the floor, you’ll probably want to place a thick rug or a mat to further improve the acoustics.
Overall, if you’re not too excited about building a vocal booth, this option would work well. But you can save a lot of money by going with some of the other options on this list.
The vocal booth that is made with a square PVC pipe frame and moving blankets is very similar to this one and would be much cheaper to make.
2. JMAZ Aluminium Frame Booth
This is not a finished vocal booth. It’s just the frame. But the frame is the most complicated part of making a vocal booth.
So this one could be covered with soundproofing material (MLV, moving blankets, acoustic panels etc.) to build a soundproof vocal booth without assembling PVC pipes or using curtain rods.
You’ll still need to cover the upper part with some material to soundproof it fully though.
The good thing about this frame is the affordable price. And also the fact that these panels can be attached or removed to make a larger/smaller booth when needed and for easier transportation.
Overall, I like it, and if you think that building the frame is the toughest part of building a vocal booth (it definitely requires a lot of different parts) this frame can be used as a shortcut.
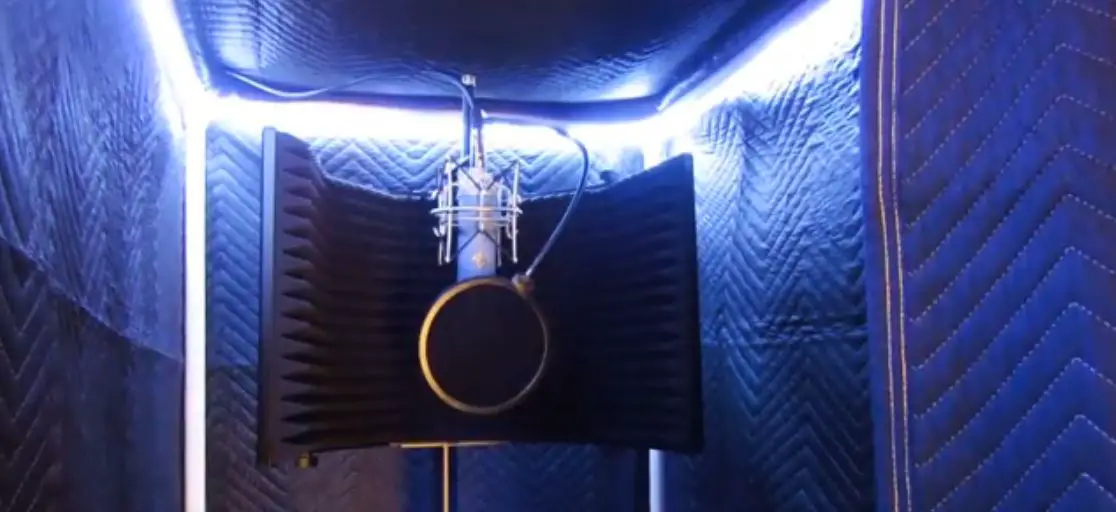
3. Aston Microphones Halo Microphone Reflection Filter, Black
There are many solid microphone booths that isolate the noise from the mic and drastically improve the sound. But this one is considered to be the best due to it’s large and uniquely shaped surface.
A microphone booth can be a useful addition even in a fully functional vocal booth. Even if you don’t have a vocal booth, you can still obtain a professional sound by using one if the noise you’re dealing with is not too severe.
Final Thoughts
You’re well aware of the changes a good vocal booth can make to your recordings. And also that the noise troubles you’re currently experiencing can be solved by soundproofing a vocal booth.
These DIY and commercial booths are all popular options used by many musicians, Youtubers and podcasters. There’s no magic in this process. You need to enclose the space, reinforce the walls with soundproofing material and use dampening material to reduce the echo. That’s all there is to it. Using a mic booth can be enough in some cases.
For more severe noise you’ll have to invest more time and effort in order to build your booth. If you have a small room that you can soundproof it would be the best option in terms of noise insulation and will reduce the costs since you won’t have to invest in building/buying a frame or making a box. In this case, the only expense you’ll have is the soundproofing material.
So hopefully this article has given you some ideas and you’ll use them to your advantage!