
How to Soundproof a Bathroom in 8 Easy Steps
Are you anxious that other people can hear your bathroom adventures? Trust me, you’re not the only one. There’s even a website called toiletanxiety.org who are currently studying this phenomena on a larger scale.
While some think that it’s unnatural to worry about others listening in, millions of people including myself would rather increase our privacy in the bathroom than live in unnecessary discomfort.
And luckily there are many ways to soundproof a bathroom or at least reduce the sound to a large extent. By employing these simple and often very affordable methods, you can make sure that your toilet adventures are not heard by anyone outside of your bathroom.
How to soundproof a bathroom:
1. Cover all gaps and cracks
Soundproofing is all about creating extra noise barriers. But what about those places where there is ZERO barrier to begin with? I’m talking about those little gaps between the door and the door frame or between the window pane and the window frame. There you have a free flow of air and sound, and that’s something you should take care of first.

Seal the frame gaps
To seal these gaps, I recommend using dense self-adhesive foam seal.
It is used by covering the frame where the gaps are present. When you close the door or window, there should be no empty space anywhere.
There are different sizes and thickness so you can choose one you think would be best for the size of the gaps you’re dealing with.
This will make a big difference for reducing sound. But there’s one more very common gap that people forget about. It’s located between the door and the floor. Even though it’s not as huge as the ones on public toilet doors, interior doors also have this bottom gap very often.
Why? Because whoever installed the door didn’t want to risk it dragging on the floor or not opening correctly. But it’s something worth taking care of and there’s a very simple solution for it. It’s called a door sweep (or door bottom).
Attach a door sweep
This is a piece of rubber/metal/foam/wood that is attached to the bottom of the door in order to cover this gap. You probably already have it on your front door, or your front door is well sealed-off to begin with.
For interior doors such as a bathroom door I recommend using silicone door sweep. It’s inexpensive and very easy to install. It’s a self-adhesive door sweep, so you can just stick it to the door and you’re done. No screws or nails are required.
Seal the cracks with an acoustic sealant
Once you’ve taken care of the gaps, make sure to caulk any cracks in the door/window and their frames. Cracks will obviously reduce the thickness of the noise barrier, so it’s worth taking care of.
There are many different products you can use for this project. I suggest using green glue acoustic sealant because I’ve used it before and it really is effective. My project involved sealing the gaps around electrical units in the walls and it did a great job. Simply pour it over any small cracks. In case you don’t know how to use it, I’ve answered some common questions in this article.
It goes without saying that you can apply these methods to (almost) any gaps and cracks in your home. Doing this will not only reduce sound, but also improve thermal insulation, reduce drafts and stop any bugs from entering the room.
2. Add mass to the door
Install MLV on the door
Now that you’ve sealed those awful gaps and cracks, it’s time to actually add thickness and density to the door. There are many soundproofing materials that can be used to do this. The most effective one is mass loaded vinyl (MLV).
This is an incredibly effective sound insulator that can block airborne and impact noise equally well. So if you have a washing machine in your bathroom that vibrates and creates a ton of noise, covering the door with MLV is a top solution.
To install MLV on the door, all you need is: a piece of MLV that’s the size of the door (you can easily cut it to size using a knife), a screw gun and some screws or a hammer and nails.
If you’re not a screwy kind of person, you can also use a regular spray adhesive to make it stick to the door. So pick one of those installation methods and get it on the door. It will act as a powerful noise barrier and no one will be able to hear what’s going on in your bathroom, at least not through the door. Mission accomplished.
Having said that, some people don’t like how MLV looks. It’s a completely black material, and that might ruin the look of your bathroom. In that case, you can paint it with latex paint to any color you want. Or cover it with a fabric of your choice.
Hang acoustic panels
Another option is to use thick acoustic panels. I’m not talking about those regular foam panels that only reduce echo. I’m talking about the real-deal soundproofing acoustic panels.
So you can use the same methods to install these on the door. Or you can use hanging strips, which will ensure that your door doesn’t get damaged by screws/nails/glue in any way. Placing two strips on each panel will do a good job of keeping them on the door permanently.
While these are great at blocking airborne noise, they won’t do too much against impact noise from vibrations. So if you have a noisy washing machine, I suggest using MLV instead.
Hang a moving blanket
And there’s the third option: thick moving blankets. One or two moving blankets hanged on the door is a very popular way to reduce noise. One of these installed on the door with nails/screws or hung from a curtain rod will be enough for significant noise reduction.
Hang a door storage unit
An often overlooked way to add mass is by actually hanging some towels and other stuff on the door. You can do that with an over-the-door hanging storage unit. Simply hang it on the door and fill up the units with towels or other soft material. This will obviously not soundproof the door completely, but it will help to a degree, especially with reducing echo.
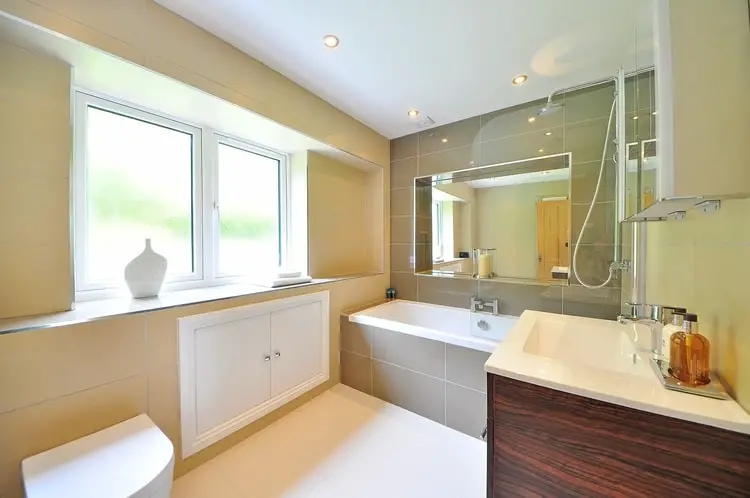
3. Soundproof the bathroom window
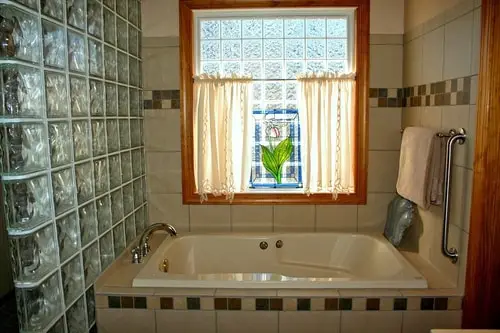
Not every bathroom has a window. But if your bathroom does, you can reduce noise by sealing the gaps/cracks and covering it with soundproofing material just like a door.
But here you have a few other methods at your disposal. One of them is using a thick moving blanket that we discussed earlier by hanging it on the window. Or you can hang a noise-blocking curtain instead.
Some bathroom windows are smaller than usual. You can cut a moving blanket to the size you need with scissors. And there are different sizes of noise-blocking curtains available as well so make sure you get the right dimensions you need. It’s better that they’re a bit bigger than the window in order to insulate some area around the window as well.
Other than that, installing an additional window pane (acrylic) to double the window’s thickness can help. Installing a storm window from the outside can work in the same way.
Installing dense window shutters is another easy way to insulate a window. You can read more about all of these methods in this window soundproofing guide.
4. Add mass to bathroom walls
Soundproofing walls in a bathroom can be more difficult than other walls if they’re covered with ceramic tiles.
Install MLV inside the wall
Soundproofing walls can be done by adding the material inside the wall on the joists (studs) and between them. Or it can be done by placing the material directly on the wall’s surface. In the first case I highly recommend using mass loaded vinyl as shown in this video:
https://www.youtube.com/watch?v=wOWwY4QMsM8&t=2s
You don’t have to use the sealant and all of these other things shown in the video if you don’t want to. They’re milking the cow a bit too much there. The results will be great even without that.
Cover the wall’s surface with soundproofing material
In the second case I recommend covering the walls from the outside with MLV or with previously mentioned thick acoustic panels. To get the perfect soundproofing results you’d have to cover the entire walls.
But I personally wouldn’t cover the ceramic tiles and would instead cover only the clear wall surface. This will still make a big difference without ruining the look of your bathroom.
Install drywall
A different method that works well is installing an additional layer of drywall. Drywall, and especially soundproof drywall are really effective for adding mass and insulation.
The problem with drywalling is the cost, which is increased by labor cost if you hire professionals to install it. That’s the main advantage of using MLV or acoustic panels – anyone can do it in an hour or so, therefore avoiding having a bathroom occupied by workers for hours if not days in some cases.
All of these different methods can be applied to the ceiling as well.
But the real question is: do you have to soundproof your bathroom walls? Chances are that taking care of the door, plus reducing the echo with some acoustic panels and rubber mats will be enough.
5. Hang acoustic panels on ceiling
Besides their soundproofing qualities which are sometimes not too good, everyone agrees that acoustic panels are awesome for reducing echo. They’re used in music studios, podcasting rooms and any place where echo reduction can be beneficial.
In case of a bathroom it can be really helpful to reduce the volume of sound and its duration. Bathroom are typically covered in ceramic tiles and there’s not much soft furniture inside. So a lot of echo is produced by the washing machine or any other activity going on inside.
To reduce the echo I strongly suggest placing acoustic panels on the ceiling because this is a large flat surface and they’re not going to bother you up there in any way.
You can hang these thick acoustic panels to get both decent soundproofing and echo reduction. Or you could go with a cheaper set of panels that will mainly reduce echo but won’t be as good for blocking noise.
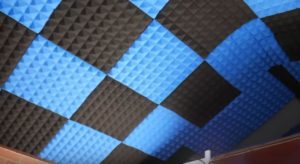
To hang them on the ceiling, use a few hanging strips on each panel, or spray their back with a spray adhesive and then stick them up there.
Again, it’s better to use hanging strips because it will make removing the panels in the future much easier and it won’t cause any damage to the wall’s surface. Either way, the final result should look similar to this:
6. Place rubber mats on the floor
Placing soft material on the floor will have a similar effect – it will further reduce echo. While you could place a carpet or a rug, I don’t recommend it because they can get wet and dirty pretty quickly on a bathroom floor.
Rubber mats are usually liquid proof and don’t get dirty as easily. Which is why they’re so often used in commercial gyms for example. Other than reducing echo, they also make the floor warm at all times and you won’t have to worry about stepping on a cold floor when you get out of the bathroom.
Depending on the thickness, rubber mats can also provide a good additional noise barrier to the floor. In other words they can muffle the noise that travels from the bathroom into the room below.
Aside from these numerous benefits, placing a rubber mat under a washer and/or a dryer can absorb a lot of the vibrations and reduce noise coming from these machines.
All of these are good reasons to utilize this option. My absolute favorite are affordable interlocking floor mats. If you’ve ever been in a commercial gym you’ve probably seen a set of these somewhere.
If you don’t plan on lifting heavy weights in the bathroom, they can last for years without any tear. As you can see there are 3 different colors and many combinations of thickness and size to choose from.
Make sure that you know the size of your floor before purchasing. Covering a larger area will produce better results.
Soundproofing the floor to block ALL noise from passing to a room below will involve more work. Such as insulating the studs and installing a subfloor (floor underlay). If you’re interested in doing that, here’s my full floor soundproofing guide.
7. Turn the exhaust fan on
So if you’re worried about people hearing you while you’re on the toilet, simply turn on the exhaust fan. I do this all the time, and it’s pretty effective at overriding the typical bathroom noises (and freshening up the air). I highly recommend installing one if your bathroom doesn’t have a window.
Standard exhaust fans are pretty affordable (usually around $50). But their price can also vary between $15 and $200 depending on the fan’s strength and other features.
8. Insulate noisy pipes with foam
Noisy, rattling pipes might also be a concern for you. Pipes are typically not coated in any soundproofing material, but it’s possible to insulate them and quiet the noise to an extent.
There are foam tubes designed specifically for pipe insulation. Once you’ve placed the foam around the pipe, seal the crack with some tape. This foam may not be large enough for your pipe. So find the correct size that will be able to coat yours before buying.
Conclusion
As you can see there are many things to consider when soundproofing a bathroom. Soundproofing the door is absolutely essential. Window as well, if you’re worried about the sound escaping outside. And you should definitely soundproof the walls to a degree if you’re worried about the sound escaping through it.
The other methods can help alleviate or reduce the noise to some extent. For example, hanging foam acoustic panels to reduce the echo in the bathroom, or placing rubber mats on the floor. But definitely soundproof the door and take care of any gaps, otherwise these other methods won’t be as effective.
Hope this helps! If you have any questions, leave a comment and I’ll help you out as soon as I can.


I just stumbled upon your website and you have some awesome advice! It’s fantastic.
I live in a mobile home and I was thinking seriously about putting FatMat on my exterior facing wall…and I wondered if it would work on the underside of the skirting as well? A guy lives next door to me with glass pipes on this truck. Two of them. At least I’ve been told they’re glass pipes. I’ve done one of my bedrooms already and until it’s finished, I’m sleeping in the spare room closest to the truck and I can hardly take it…it’s like a cannon goes off in the morning @ 4:15 no less. Not that the manager can do anything about it, so she says, because they’re supposedly ‘legal’
Hi Sally! I’m glad that you’ve found my advice helpful.
You could definitely cover the underside of the skirting with FatMat or a similar sound deadener. And if the noise is really terrible and there’s space available for installing extra material, I’d also place a thick closed-cell foam mat on top of the FatMat. This is standard practice for soundproofing vehicles and it could work well in this case as well.
The Vibro mat (https://amzn.to/2ytXXMT) would be a good choice if you decide to do this, but there are other good options as well. Hope this helps!